There are several different ways to control exposure, or the amount of light that reaches a camera's sensor. Each of them produces a secondary effect, in addition to making the image brighter or darker. This allows for creative effects that you want to learn to use to your advantage, to express what you want to say with your images.
Exercise for this tutorial:
Self-portrait: This time, you are the subject. Plan 3 posed, self-timer shots (not selfies!) that describe you through the action you are performing in the shot or your positioning within your home environment.
Create a simple Web Page in Adobe Creative Cloud Express and upload the images there with a brief text. Submit the link on Blackboard 24 hours before next week's tutorial.
From Henry Carroll 2018 'Read this if you want to take great photographs' Laurence King Publishing Ltd
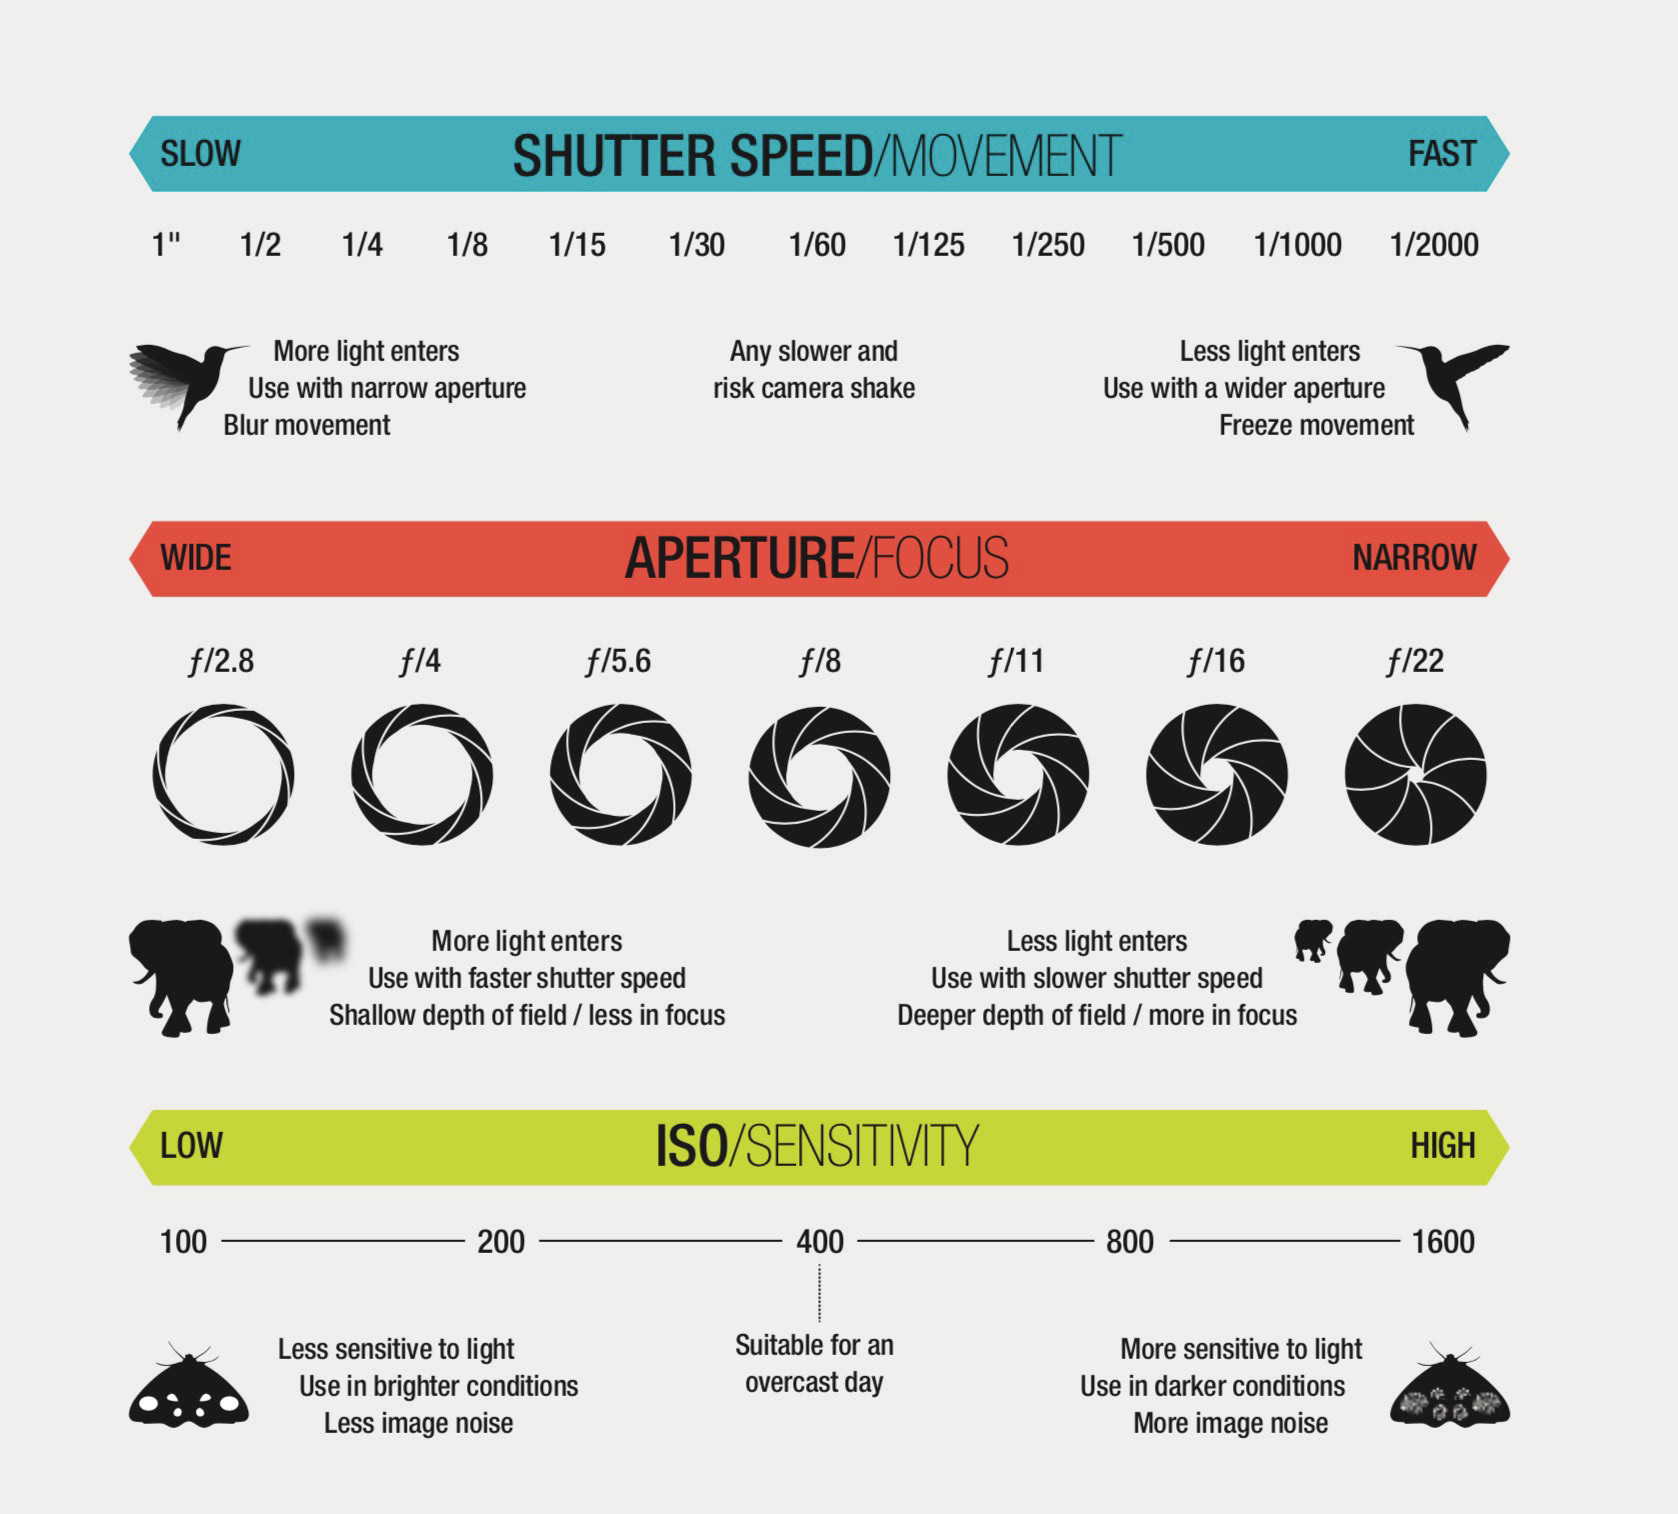
Three parameters
The three things you can adjust to set your exposure are:
• Shutter speed - controls how long for your sensor is exposed to light
• Aperture - reduces the quantity of light passing through the lens
• Sensitivity - expressed in ISO, is how much the image is boosted by the camera
The really important thing is to understand that if you set your camera on an ideal exposure, changing one of these parameters will mean that you have to compensate through the others. So for example if you want a faster shutter speed you will need to increase the sensitivity or open the aperture. If you want to close the aperture as much as possible you will need to slow down the shutter speed or increase the sensitivity.
Now, on most phone cameras aperture is fixed or limited to two, really close values only, because the lens is really small, so we don't need to worry too much about it. I'll explain how it affects focus in the next workshop. Let's look at shutter speed and sensitivity for now.
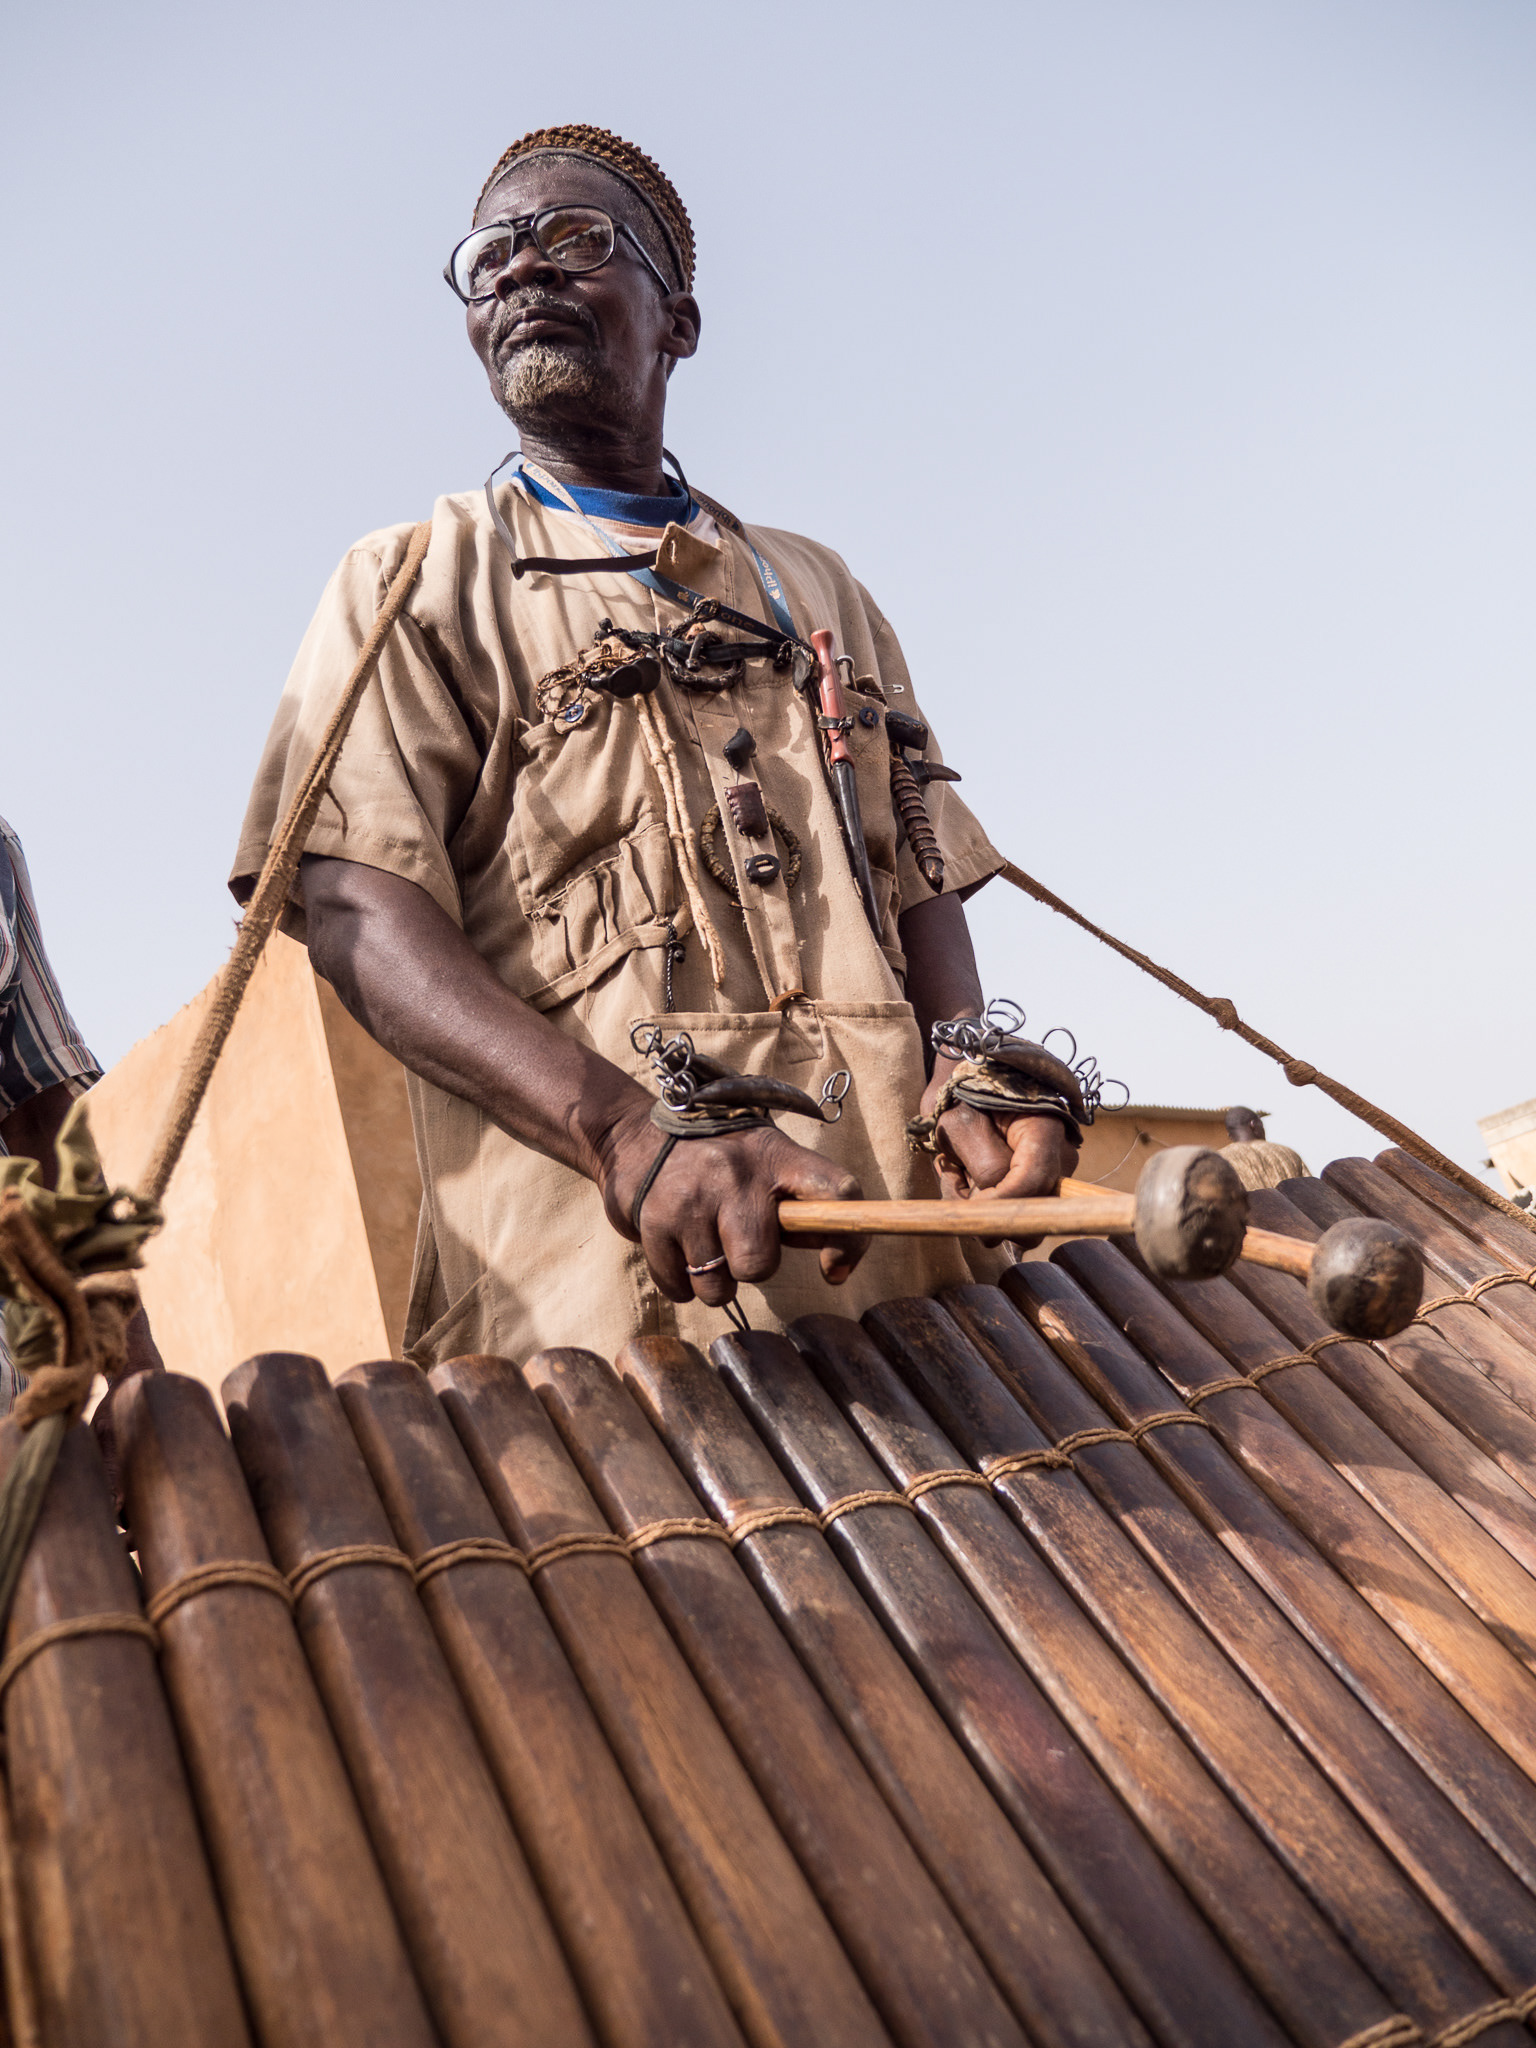
Outdoors, plenty of light, a shutter speed of 1/2500th of a second freezes the movement of the xylophone sticks

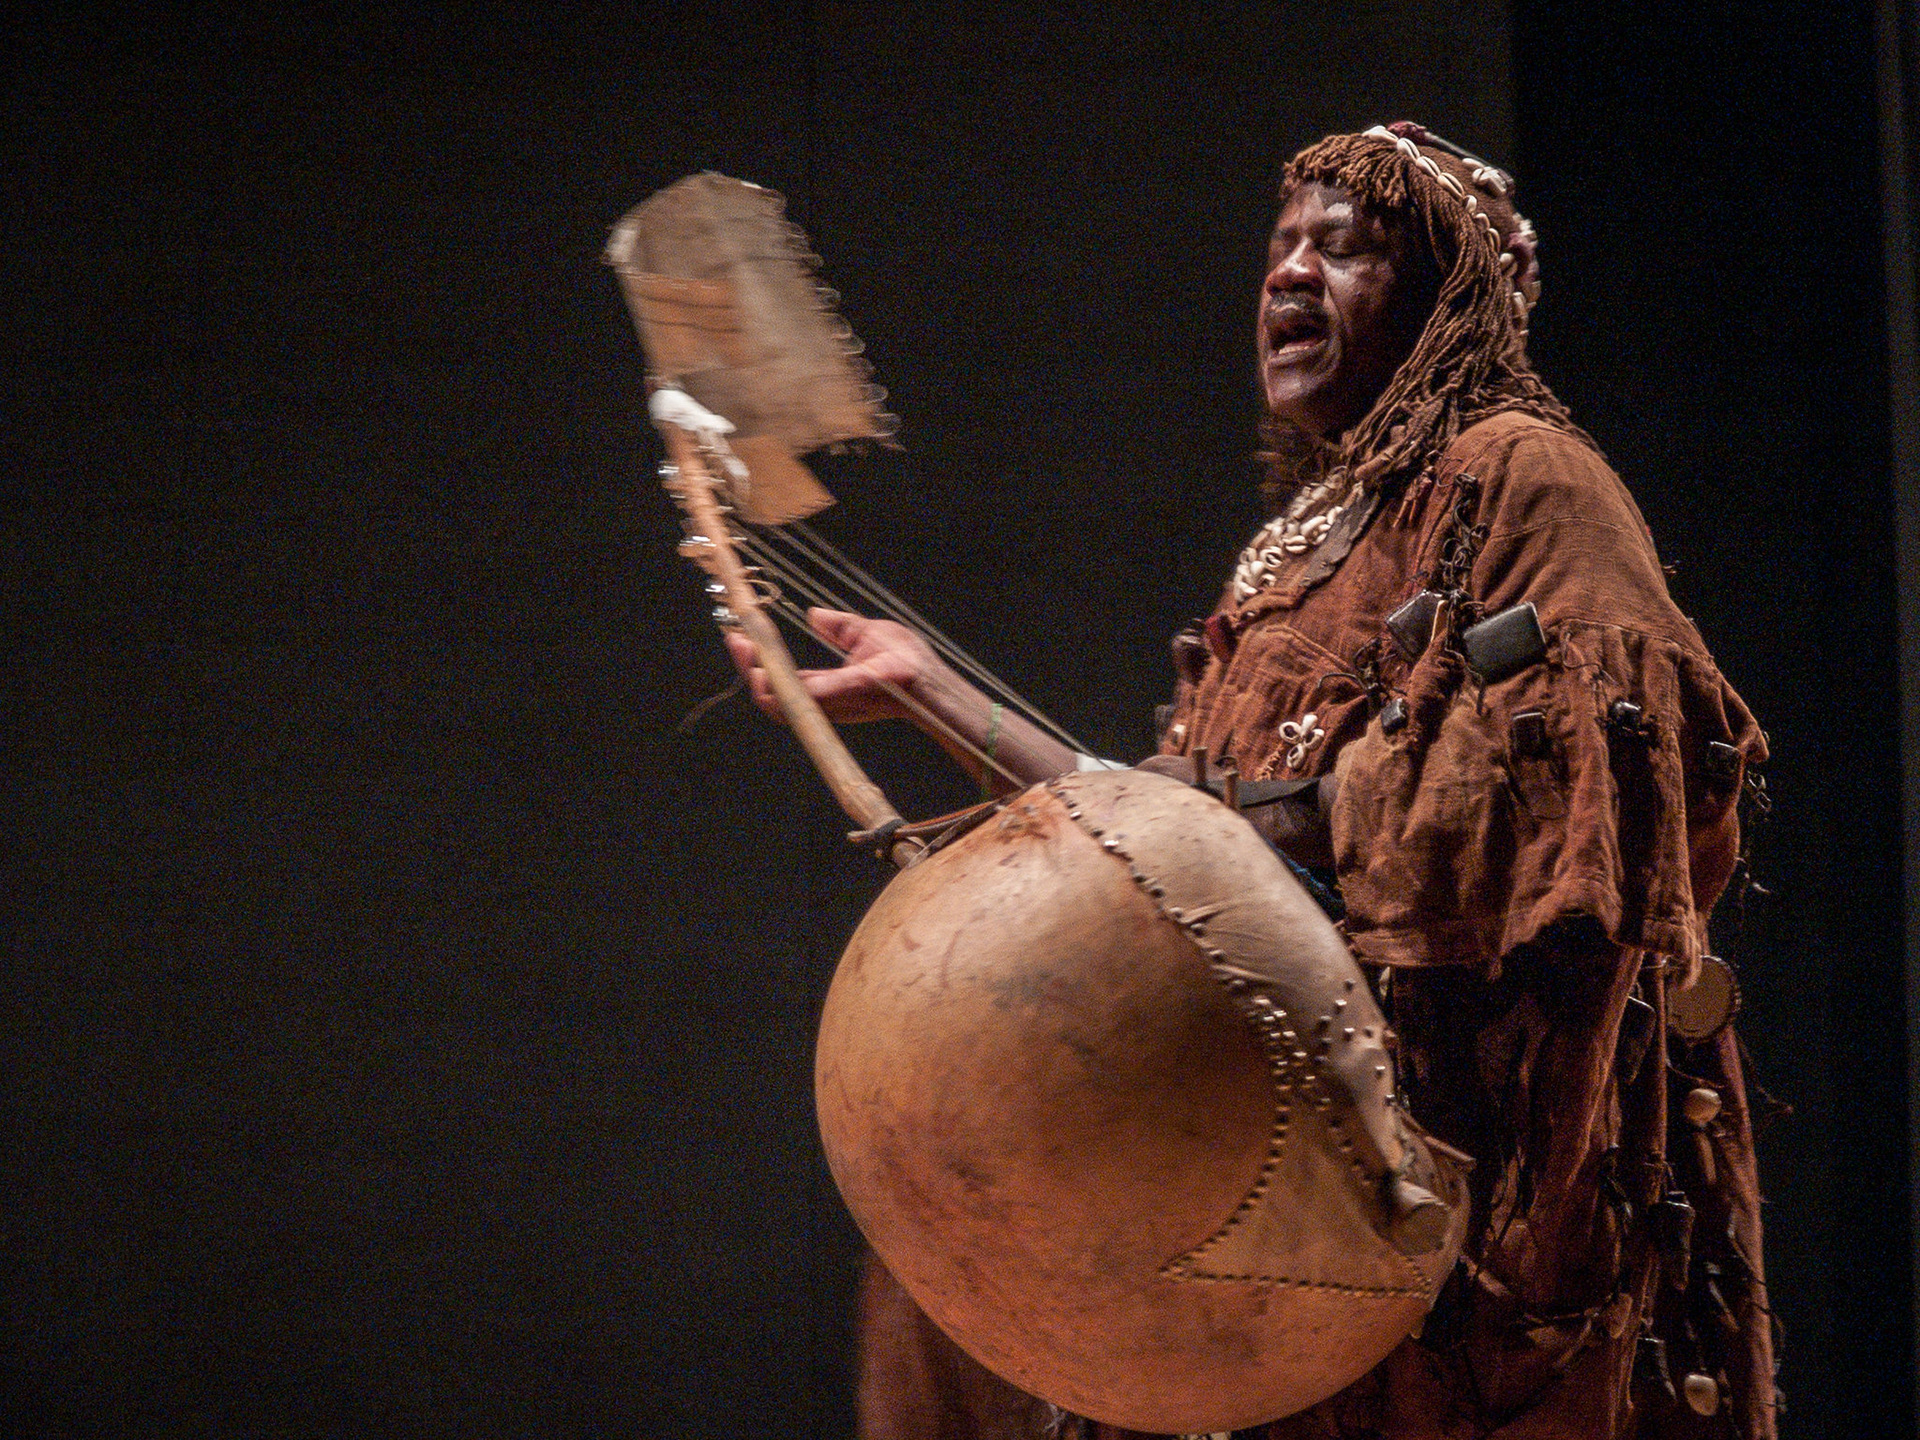
Compare here (on a dark stage) how the sticks are blurred by a shutter speed of 1/80th of a second
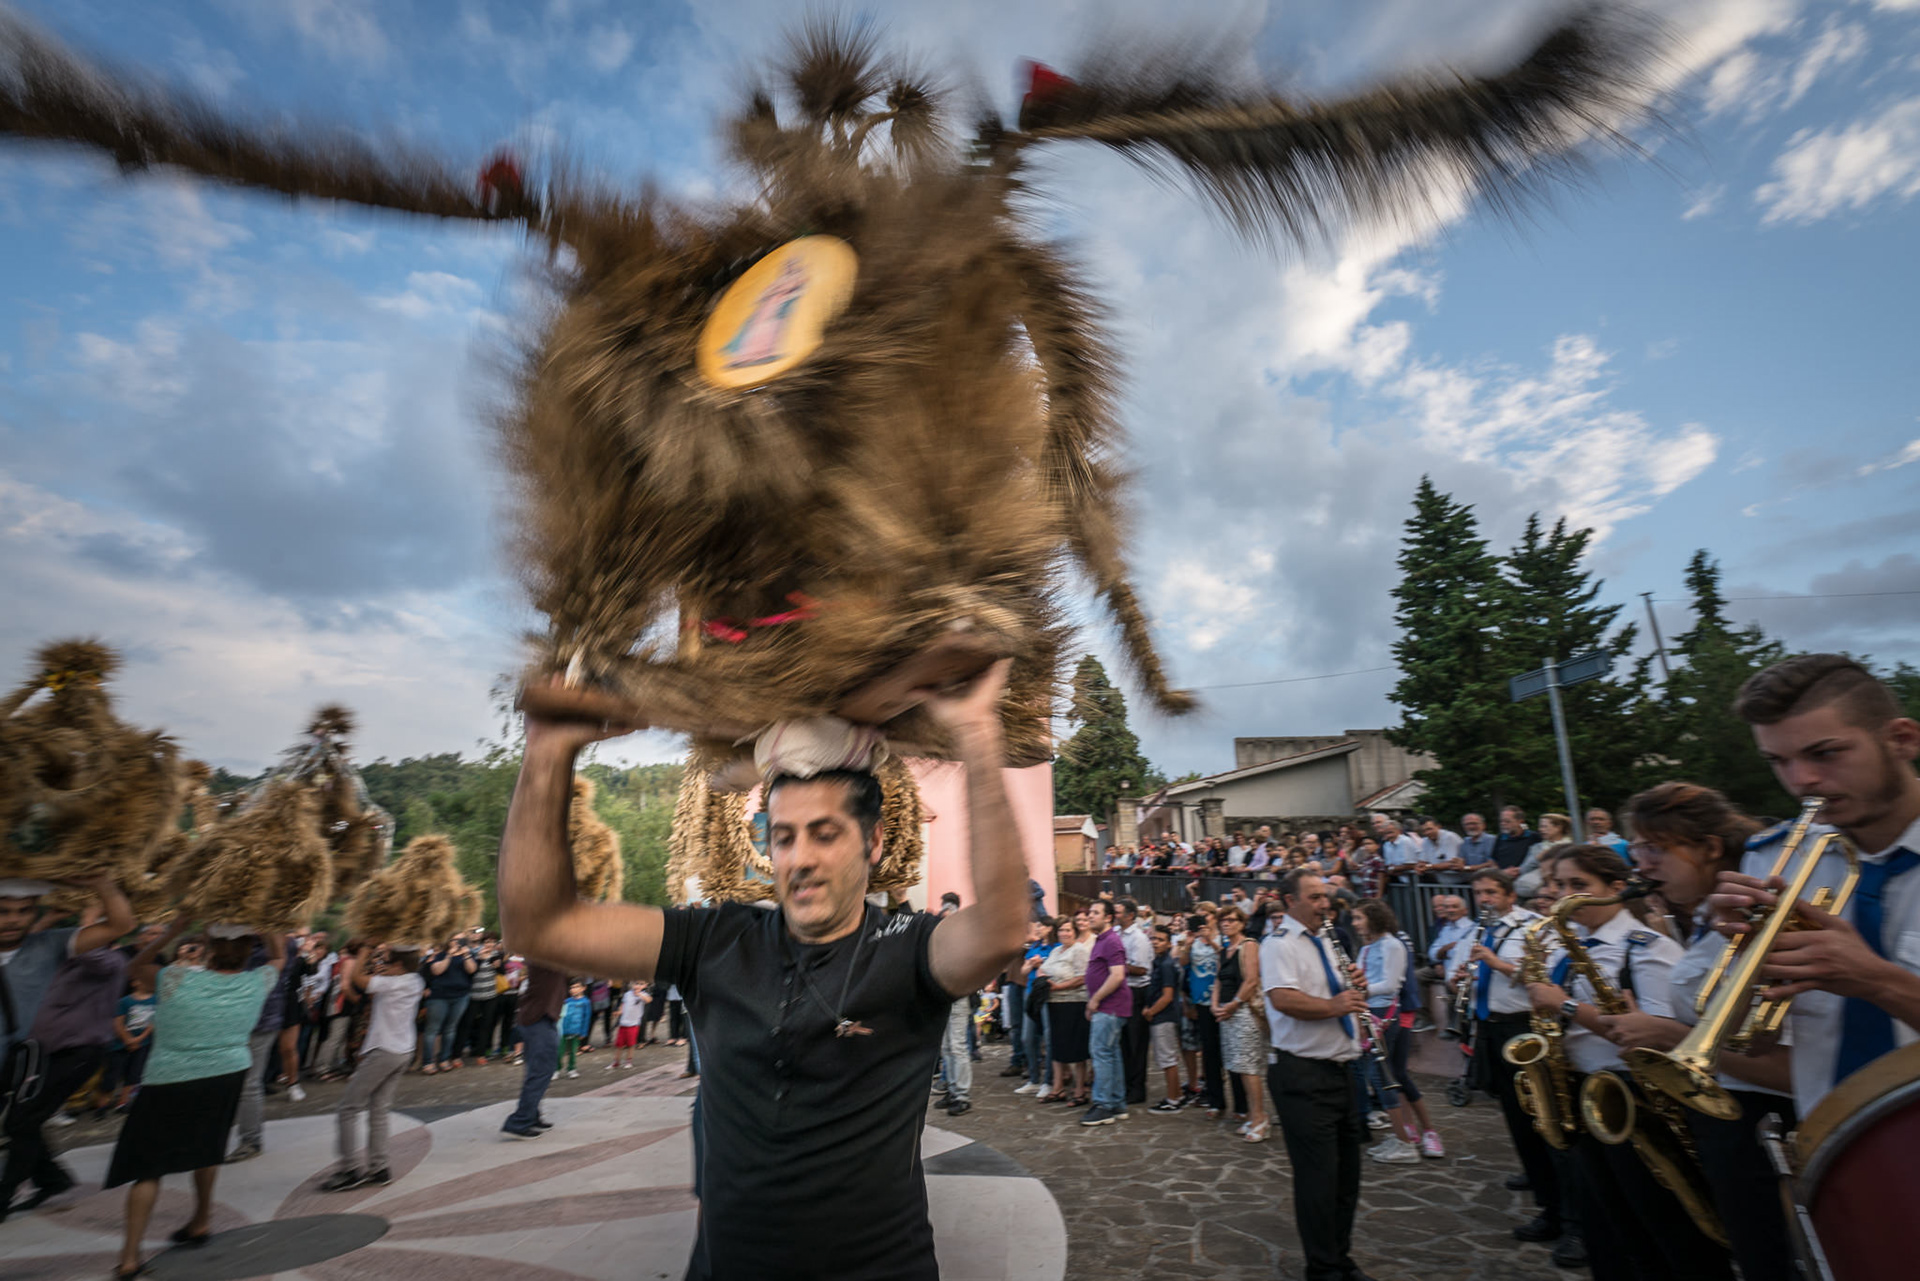
A shutter speed of 1/50th of a second was enough to create blur because he was rotating fast

Here I am moving the camera in the same direction as the subjects, so the bystanders are more blurred than those who move. Shot at 1/20th of a second
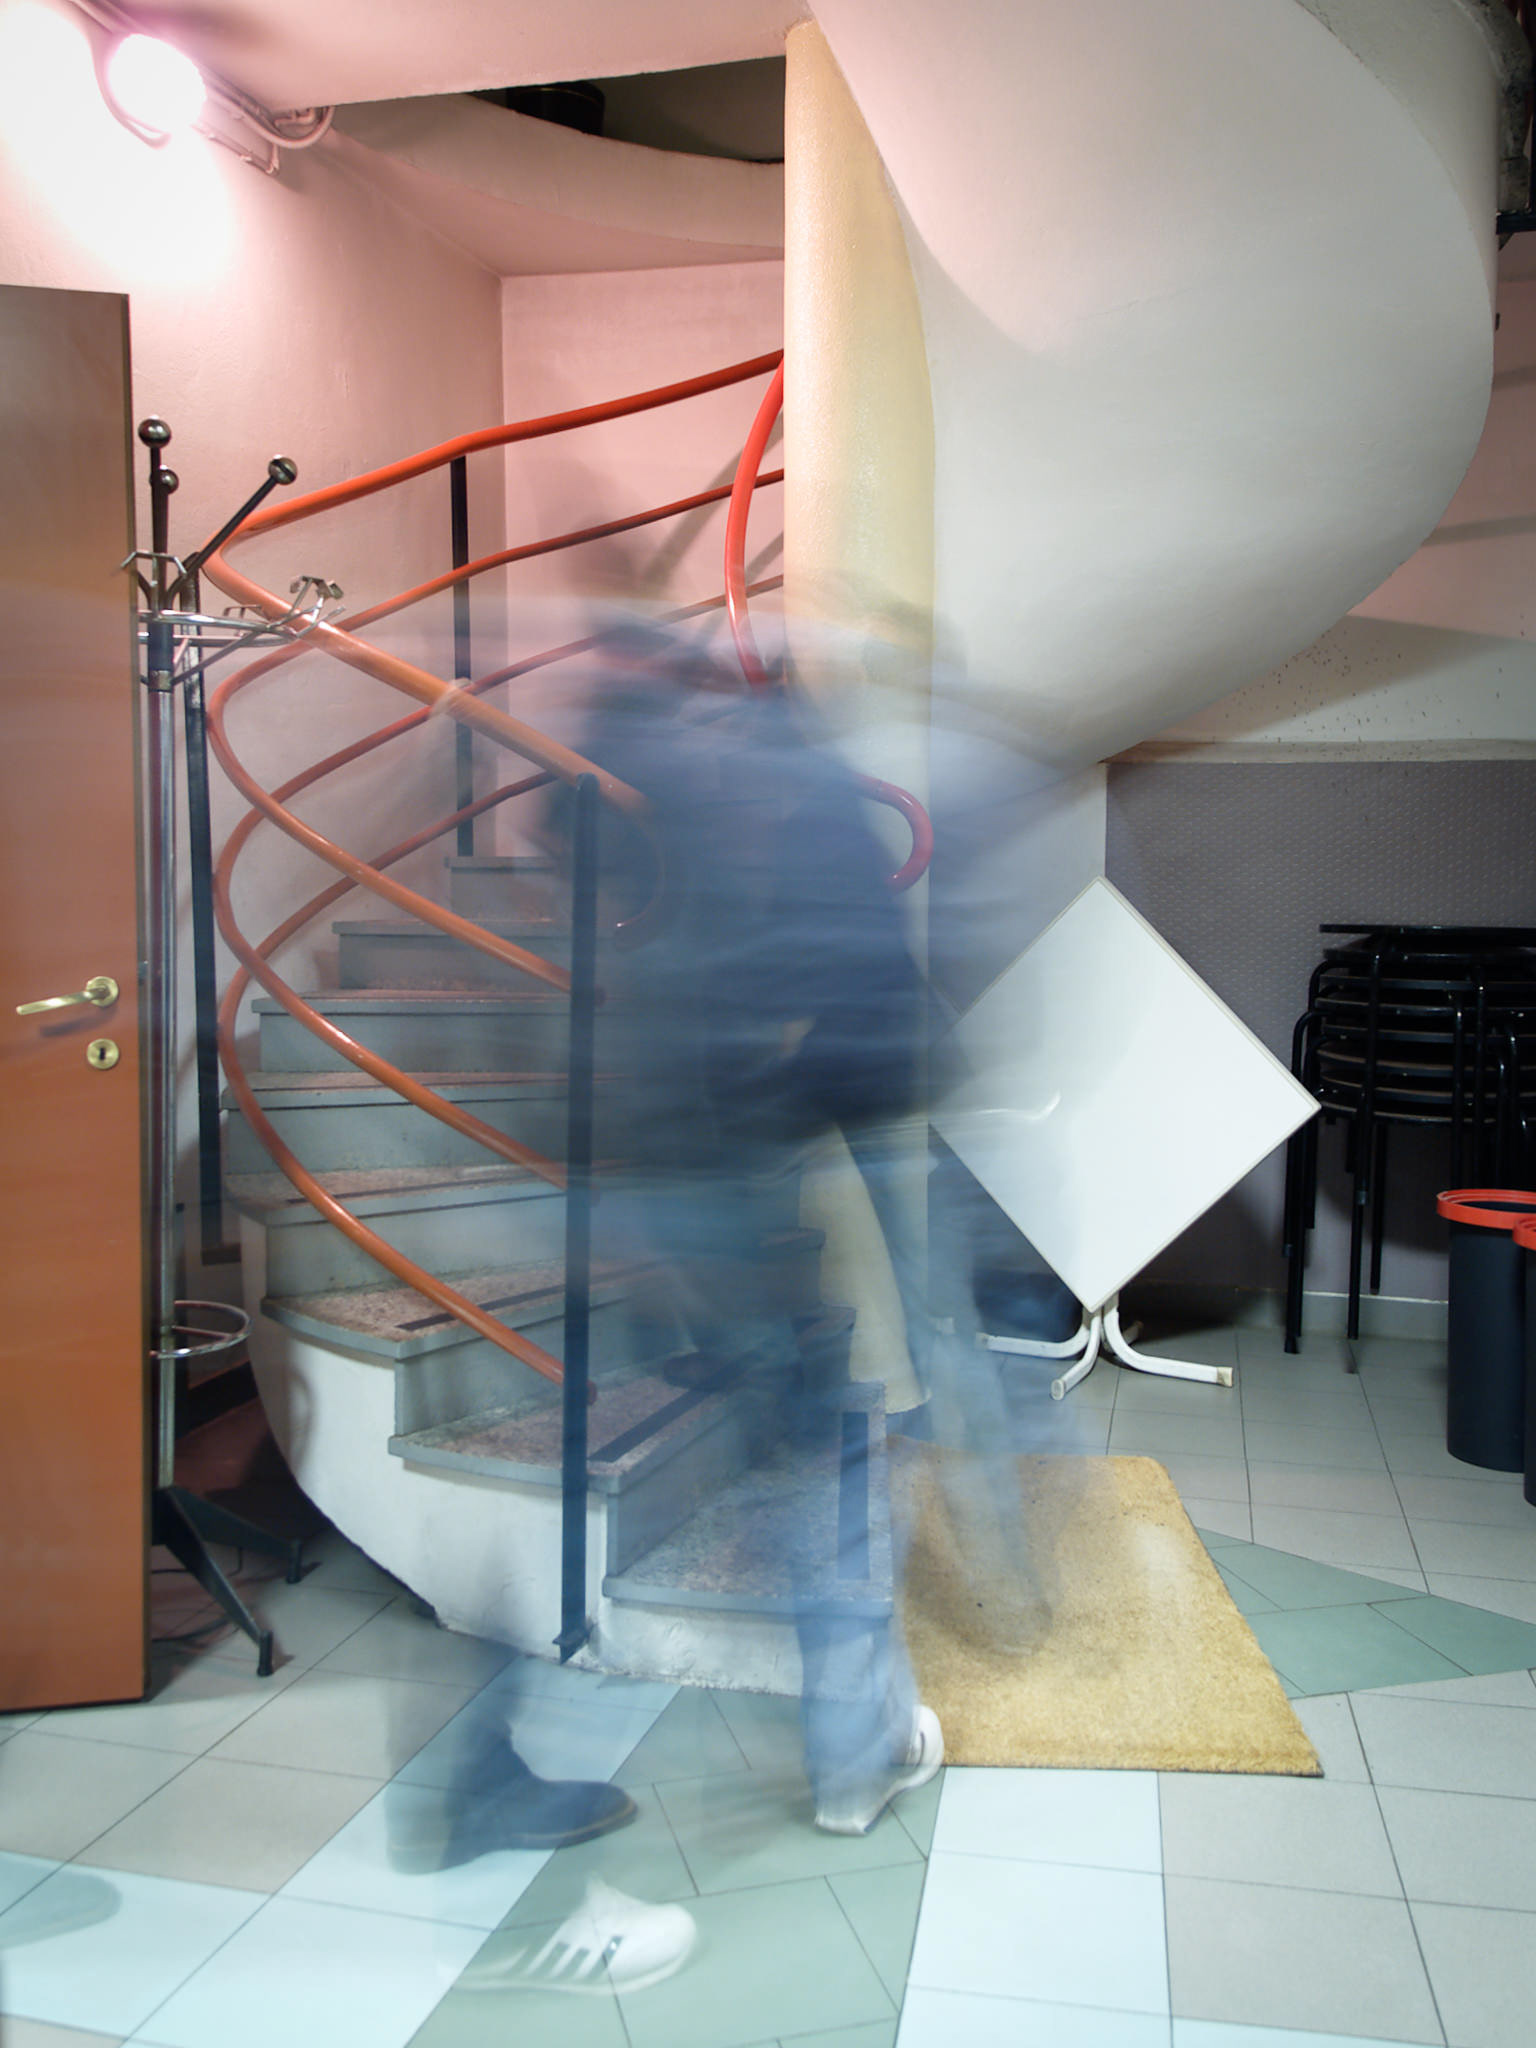
This was shot at 1.3 seconds with the camera on a tripod. At night, with even longer exposures, you could make people disappear entirely as long as they move
Shutter speed
By changing shutter speed you have the possibility to freeze movement (fast shutter speeds) or to blur it (slow shutter speeds). When I say movement, this also includes the natural shake of your hand when you make the picture, so you need a minimum of about 1/30th of a second to make sure that the whole image isn't blurry. This might be more or less, depending on how stable your hands are. If you support the camera in some way (with a tripod, or resting it against something else) you can use slower speeds and then the blur will be only of the subject, as long as it moves. Most of the time you will want your images to be sharp, but sometimes you might be after a certain effect or mood that can only be achieved by sacrificing clarity.
Nouma Diakite, shot at a relatively high ISO value
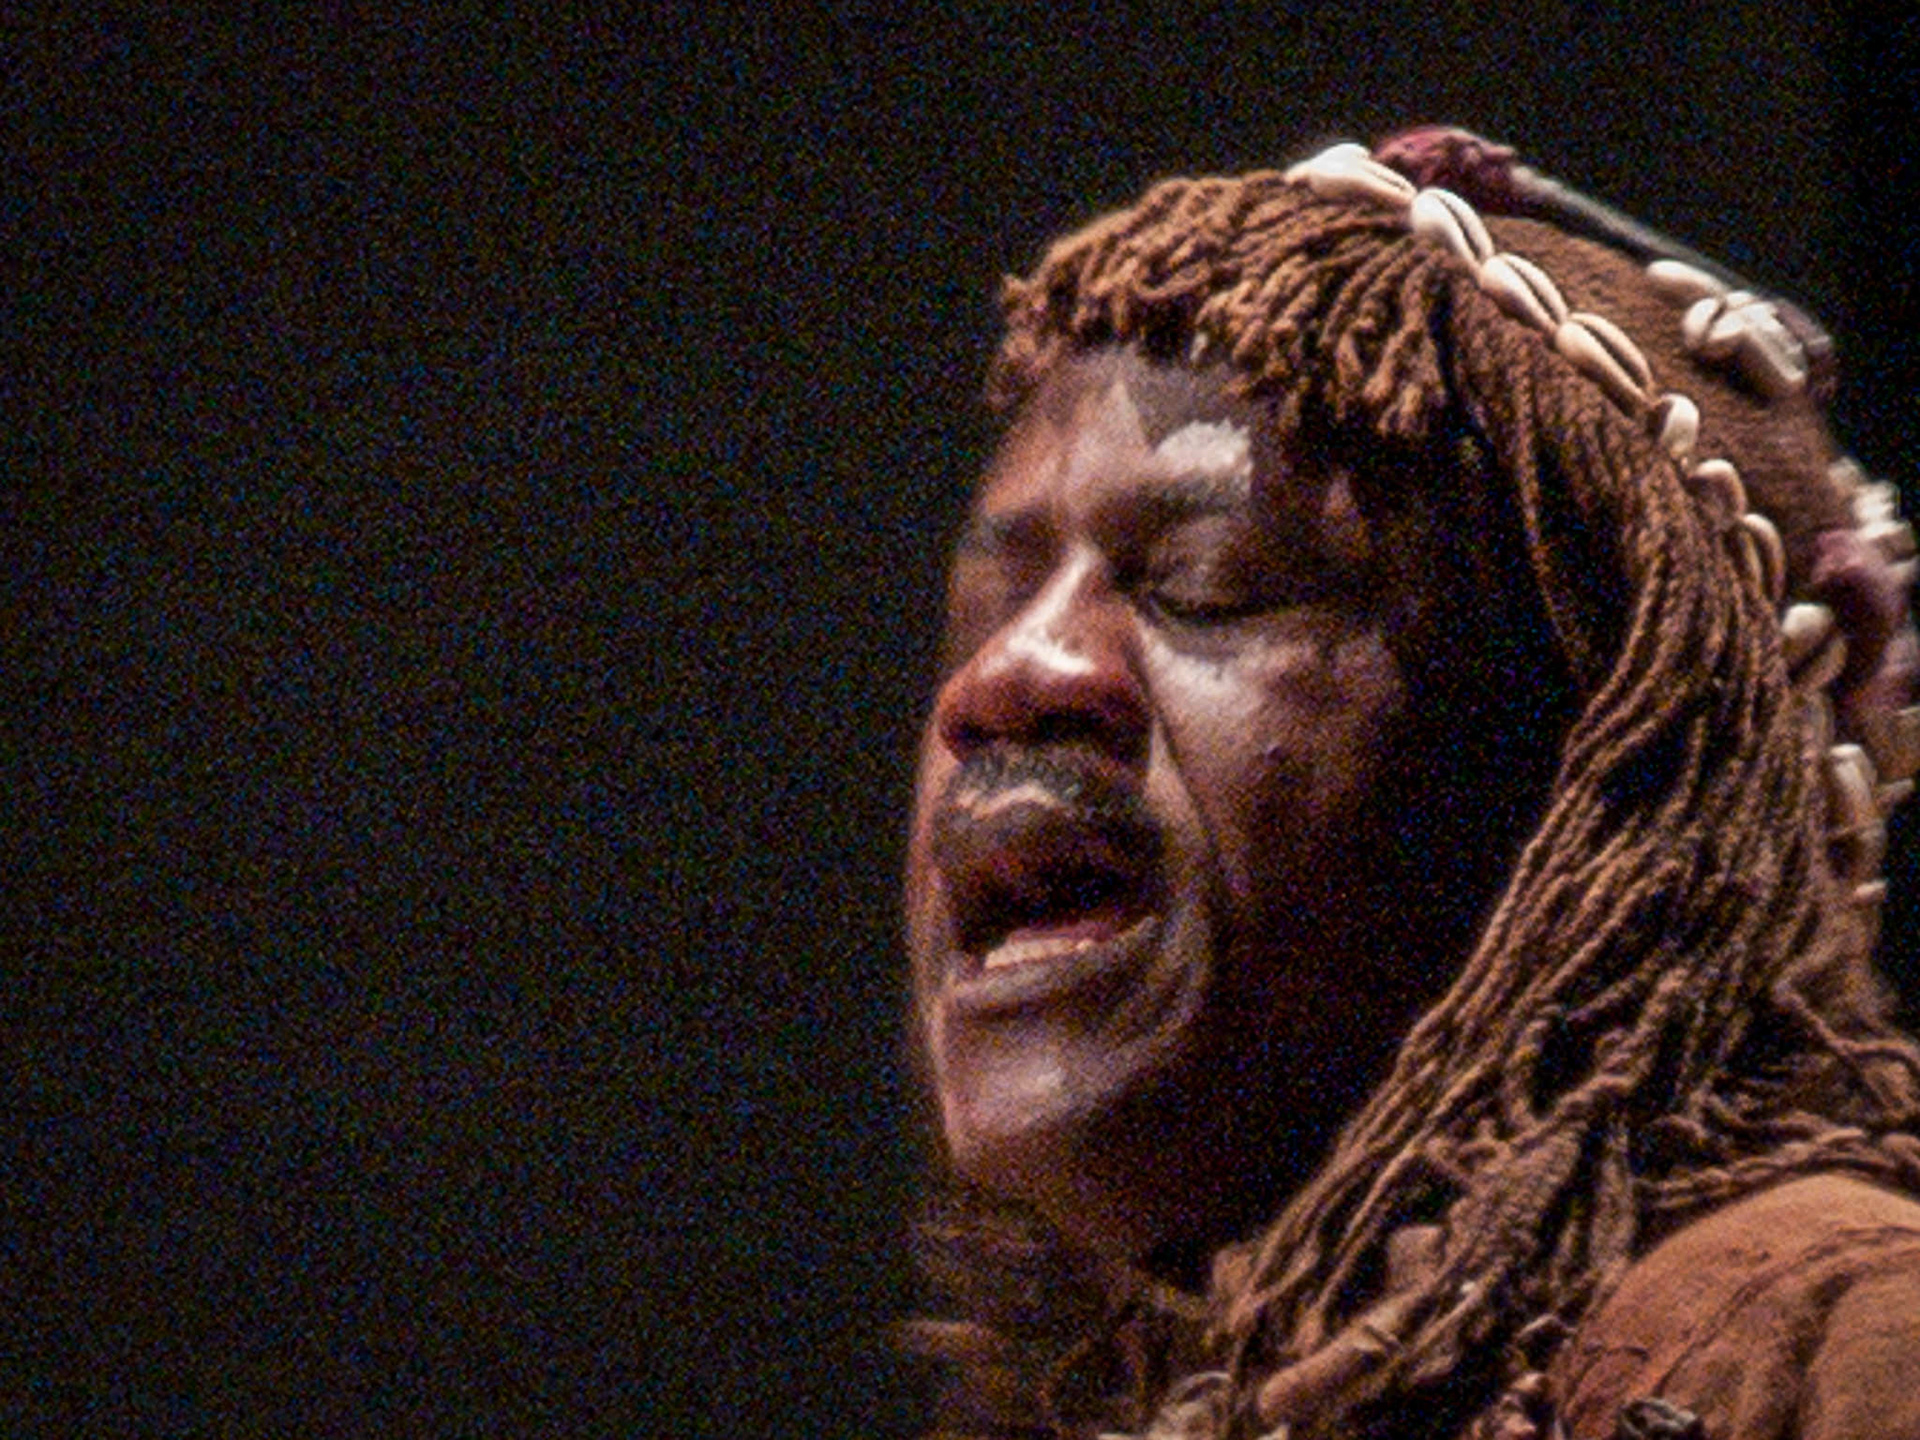
A crop of the same image shows the evident noise pattern
Sensitivity
Increasing the sensitivity means boosting the electrical signal that the camera records through its pixels. Unlike shutter speed and aperture, this parameter does not really increase the light that arrives on the sensor, it simply brightens the image after the fact. You can see it as boosting the volume of a recording that has been recorded too low. If you've had the experience, you'll know that as you turn up the volume you start to hear a hiss that previously wasn't there. Increasing the sensitivity introduces noise, which in an image is visible as 'grain' - a pattern of spots that interfere with the detail of the subject. Smaller sensor cameras, and especially those in smartphones, become noisy very quickly. So you want to keep your sensitivity (expressed as an ISO value) always as low as possible to get the best image quality. But most of the time it is a compromise, if there isn't a lot of light you will need to up the ISO value or the shutter speed will end up being so low that the picture will be all blurry.
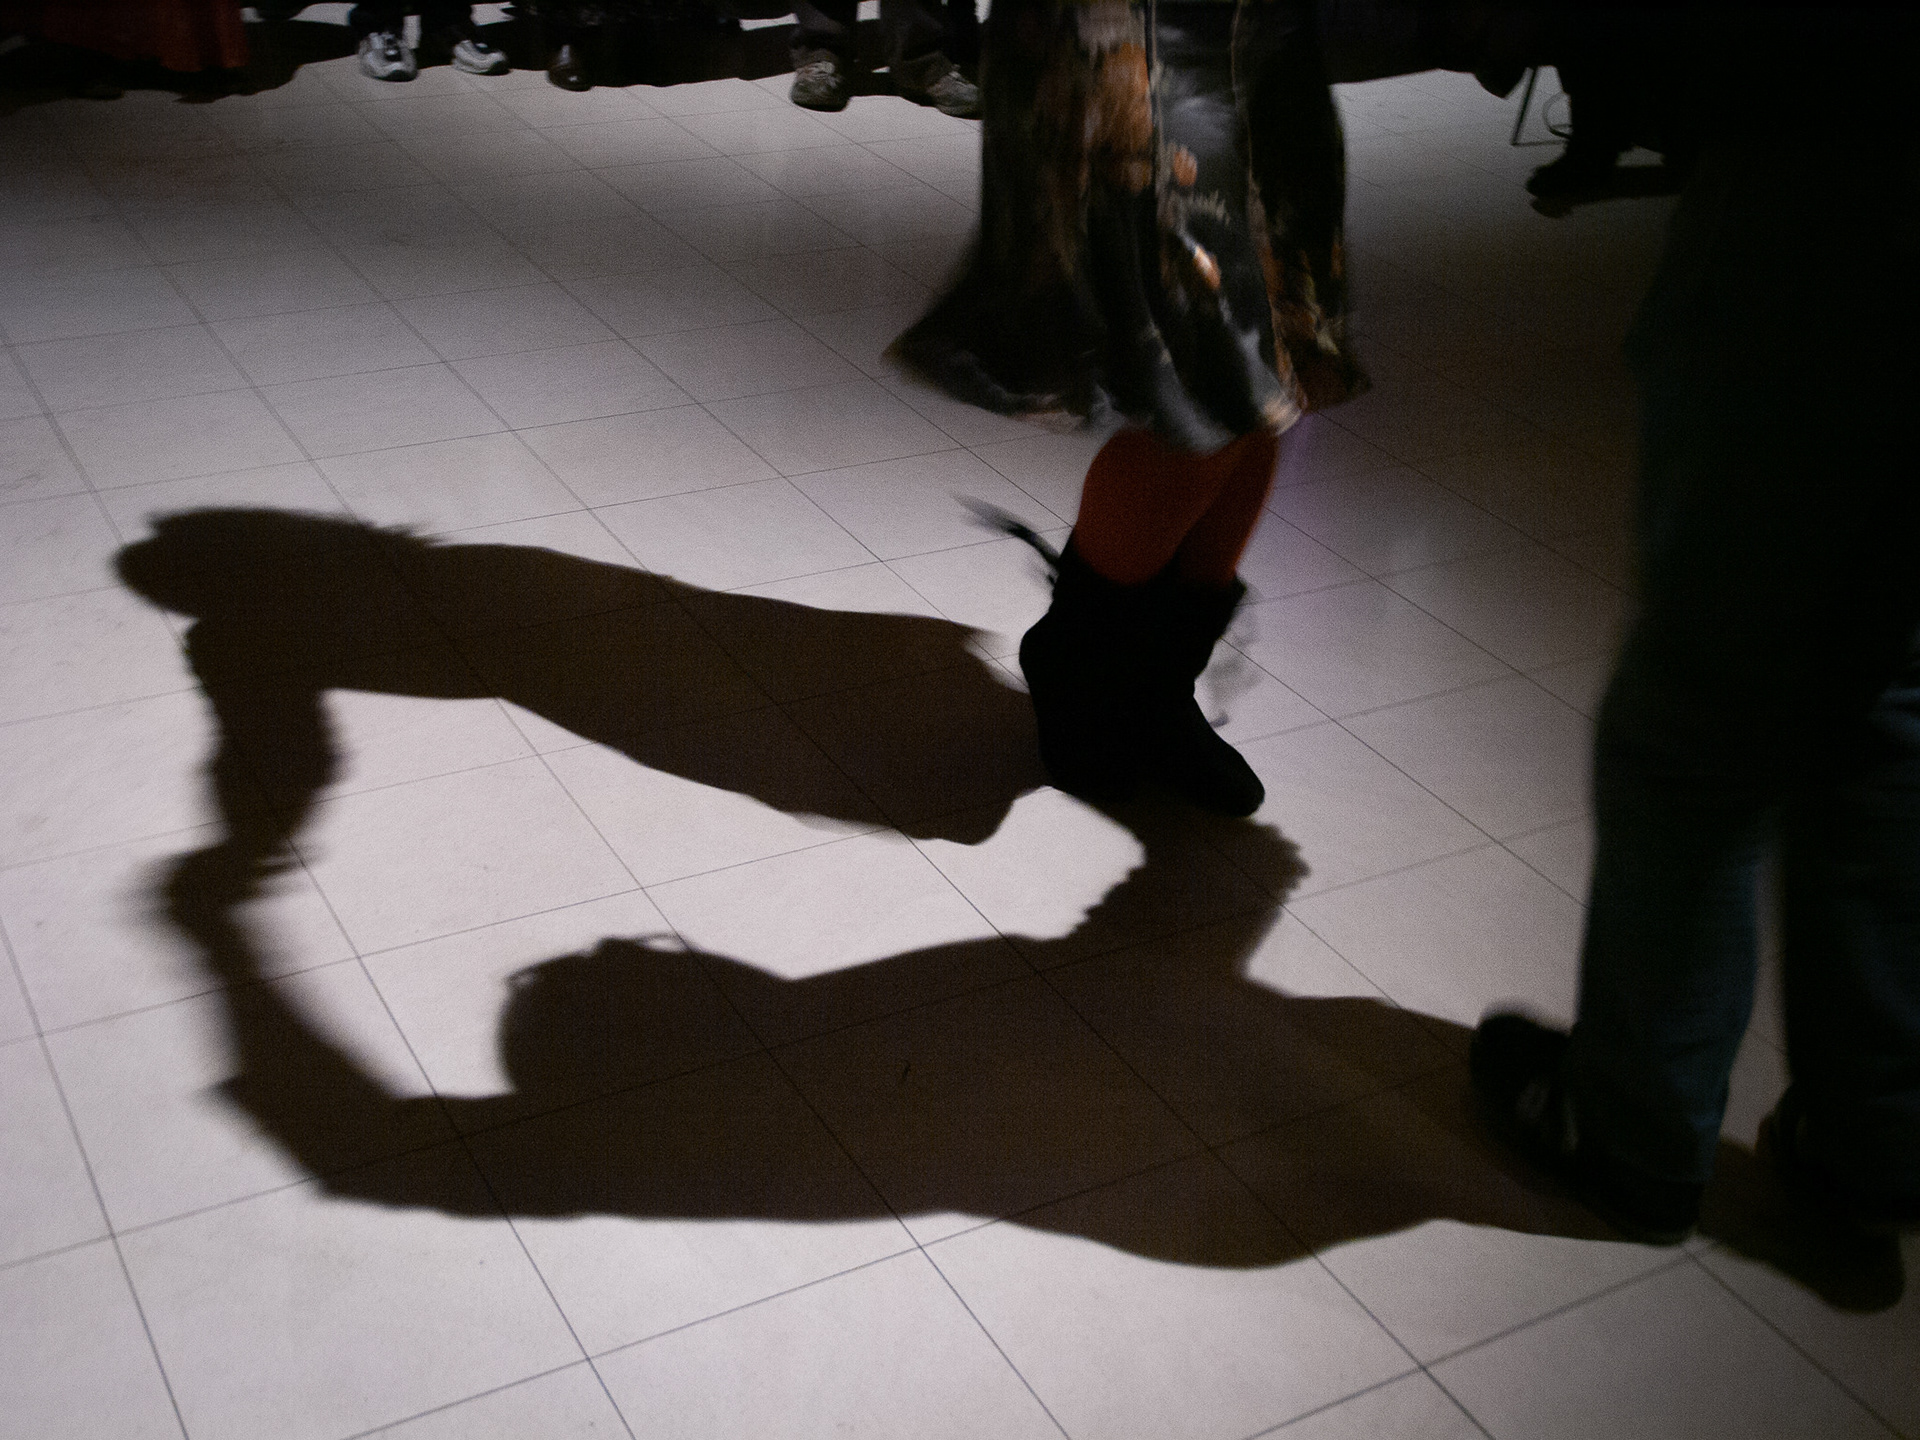
This image is technically 'too dark' but in this way I focus the attention on the dancers' shadows
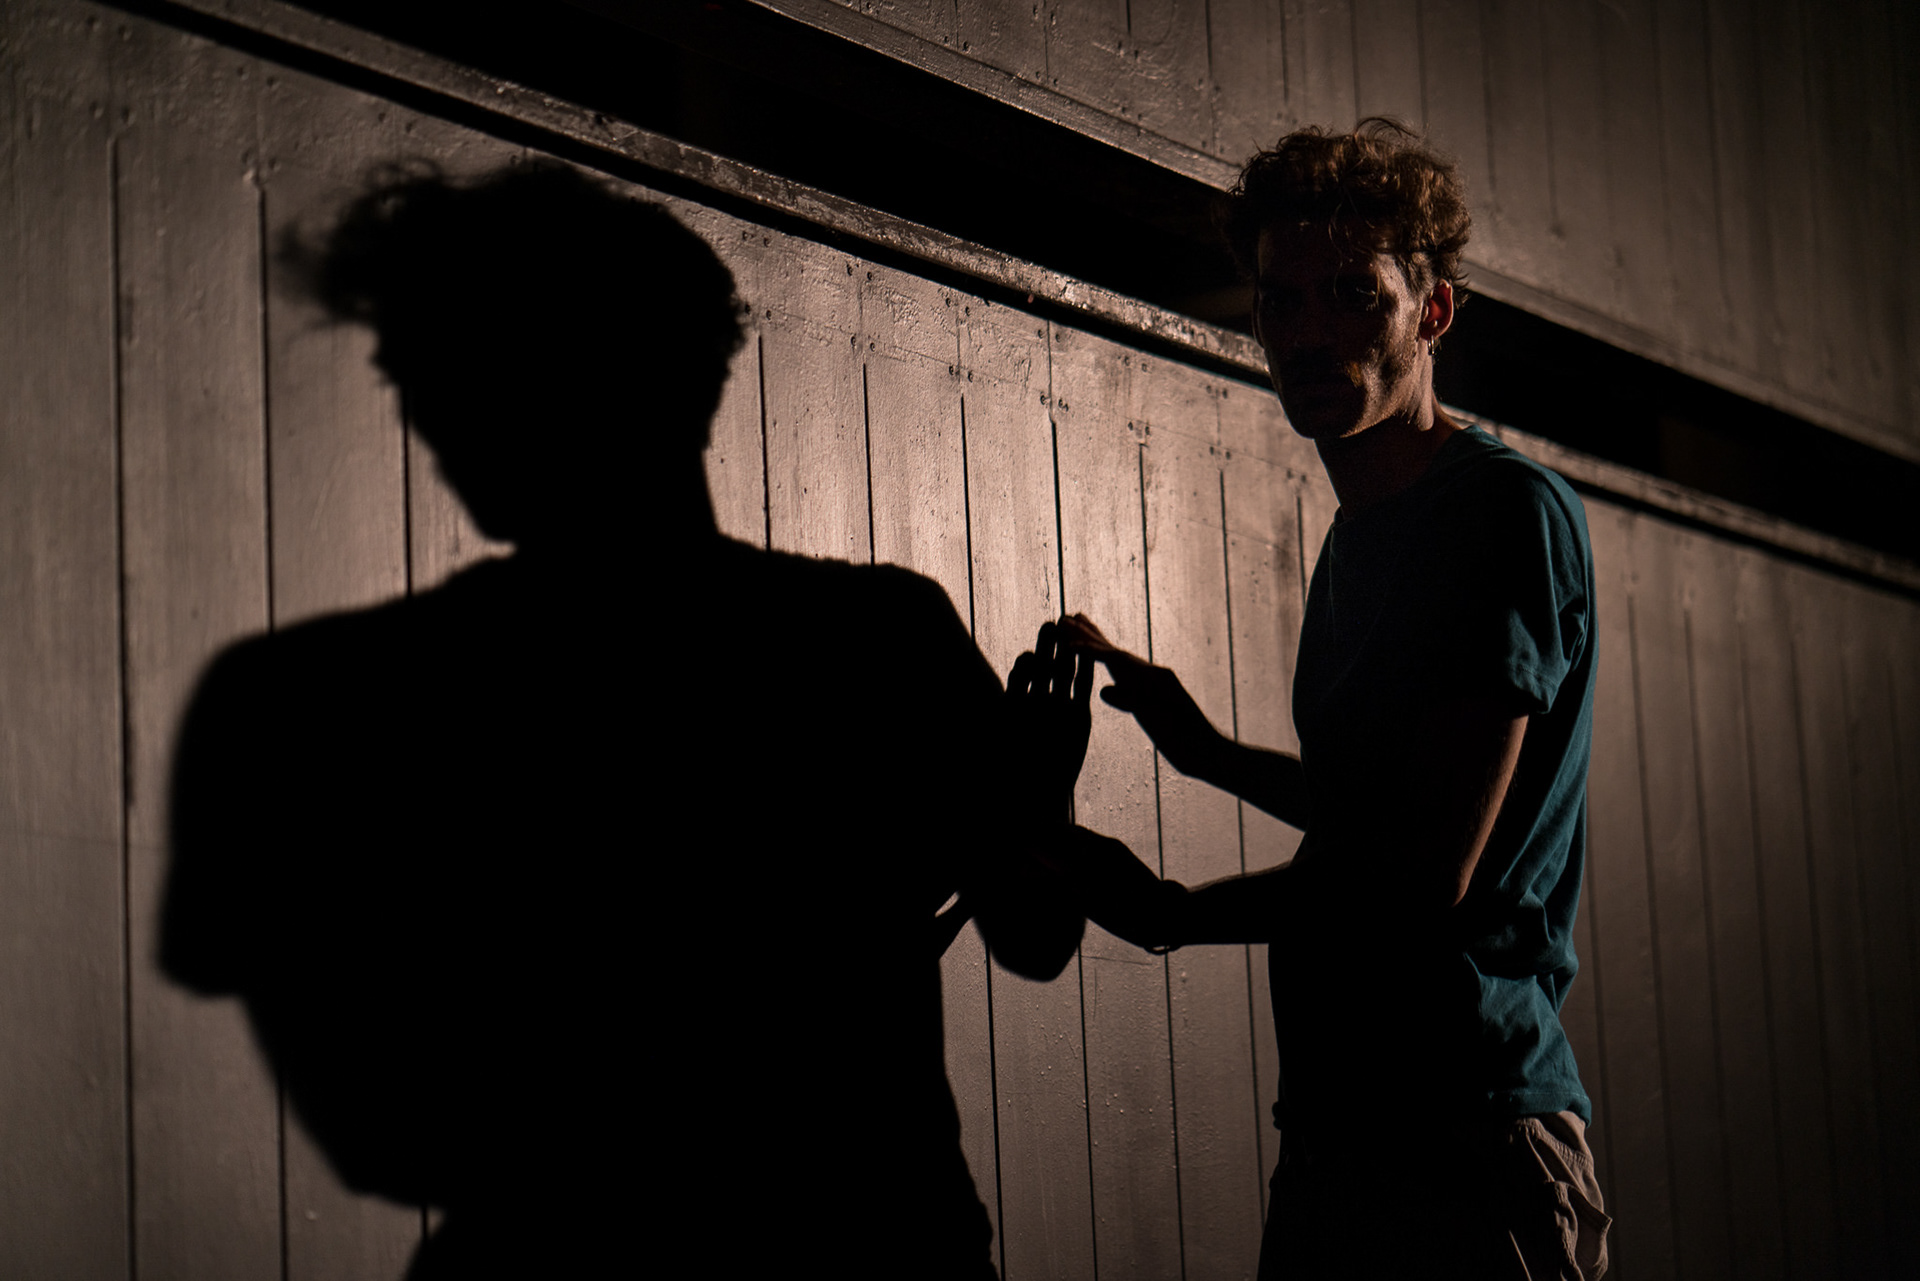
Again a very dark image, but the way I exposed it suggests drama, there is even a sense of threat
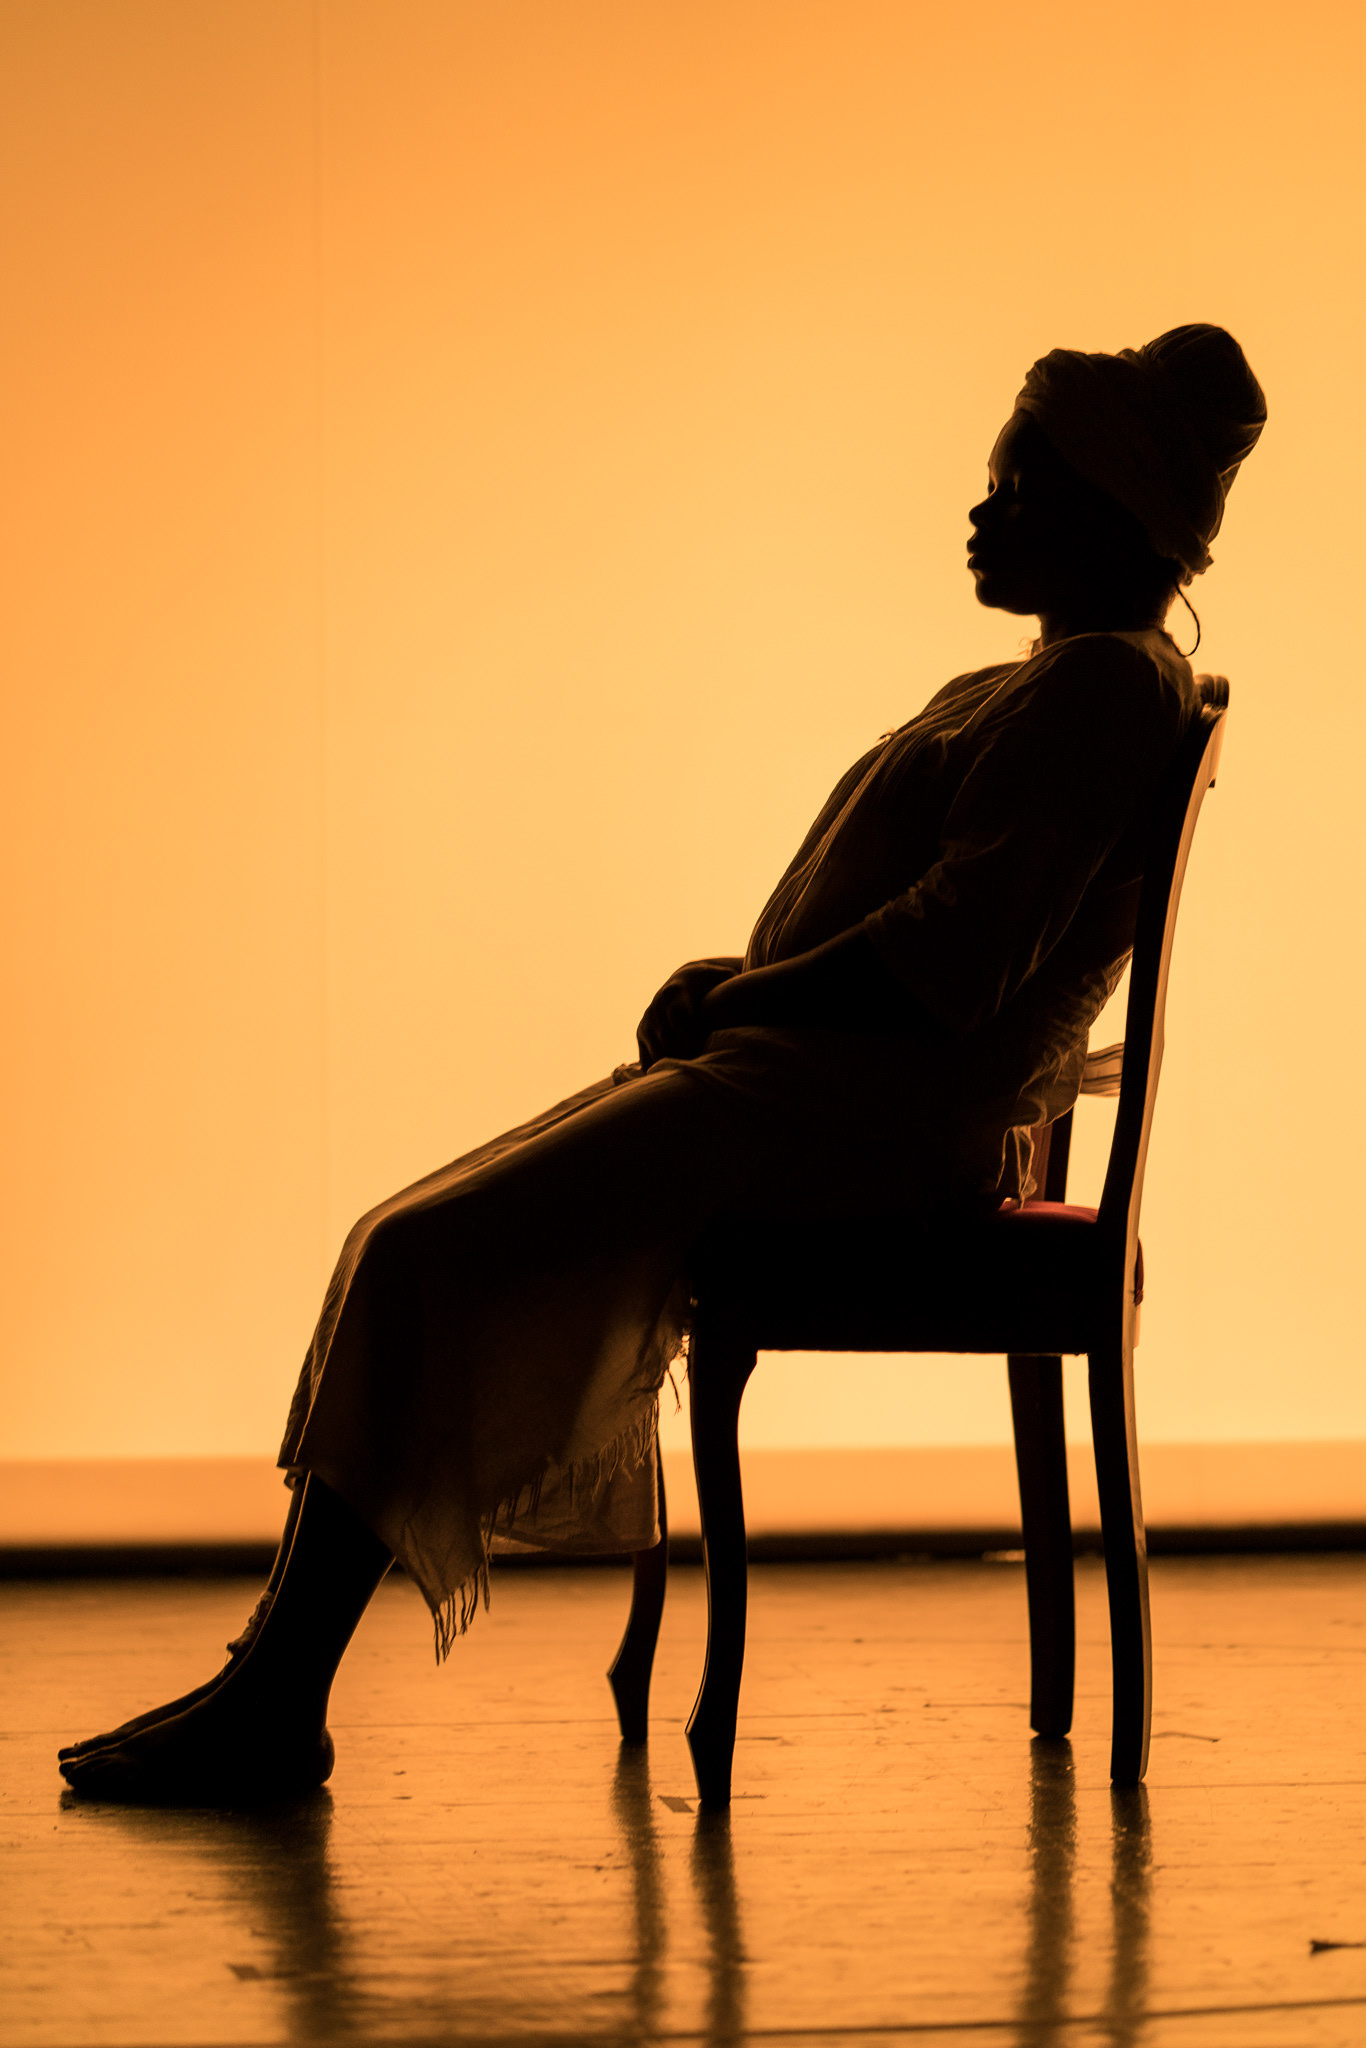
Here I am exposing for the background, silhouetting the subject, Most cameras would suggest a brighter exposure
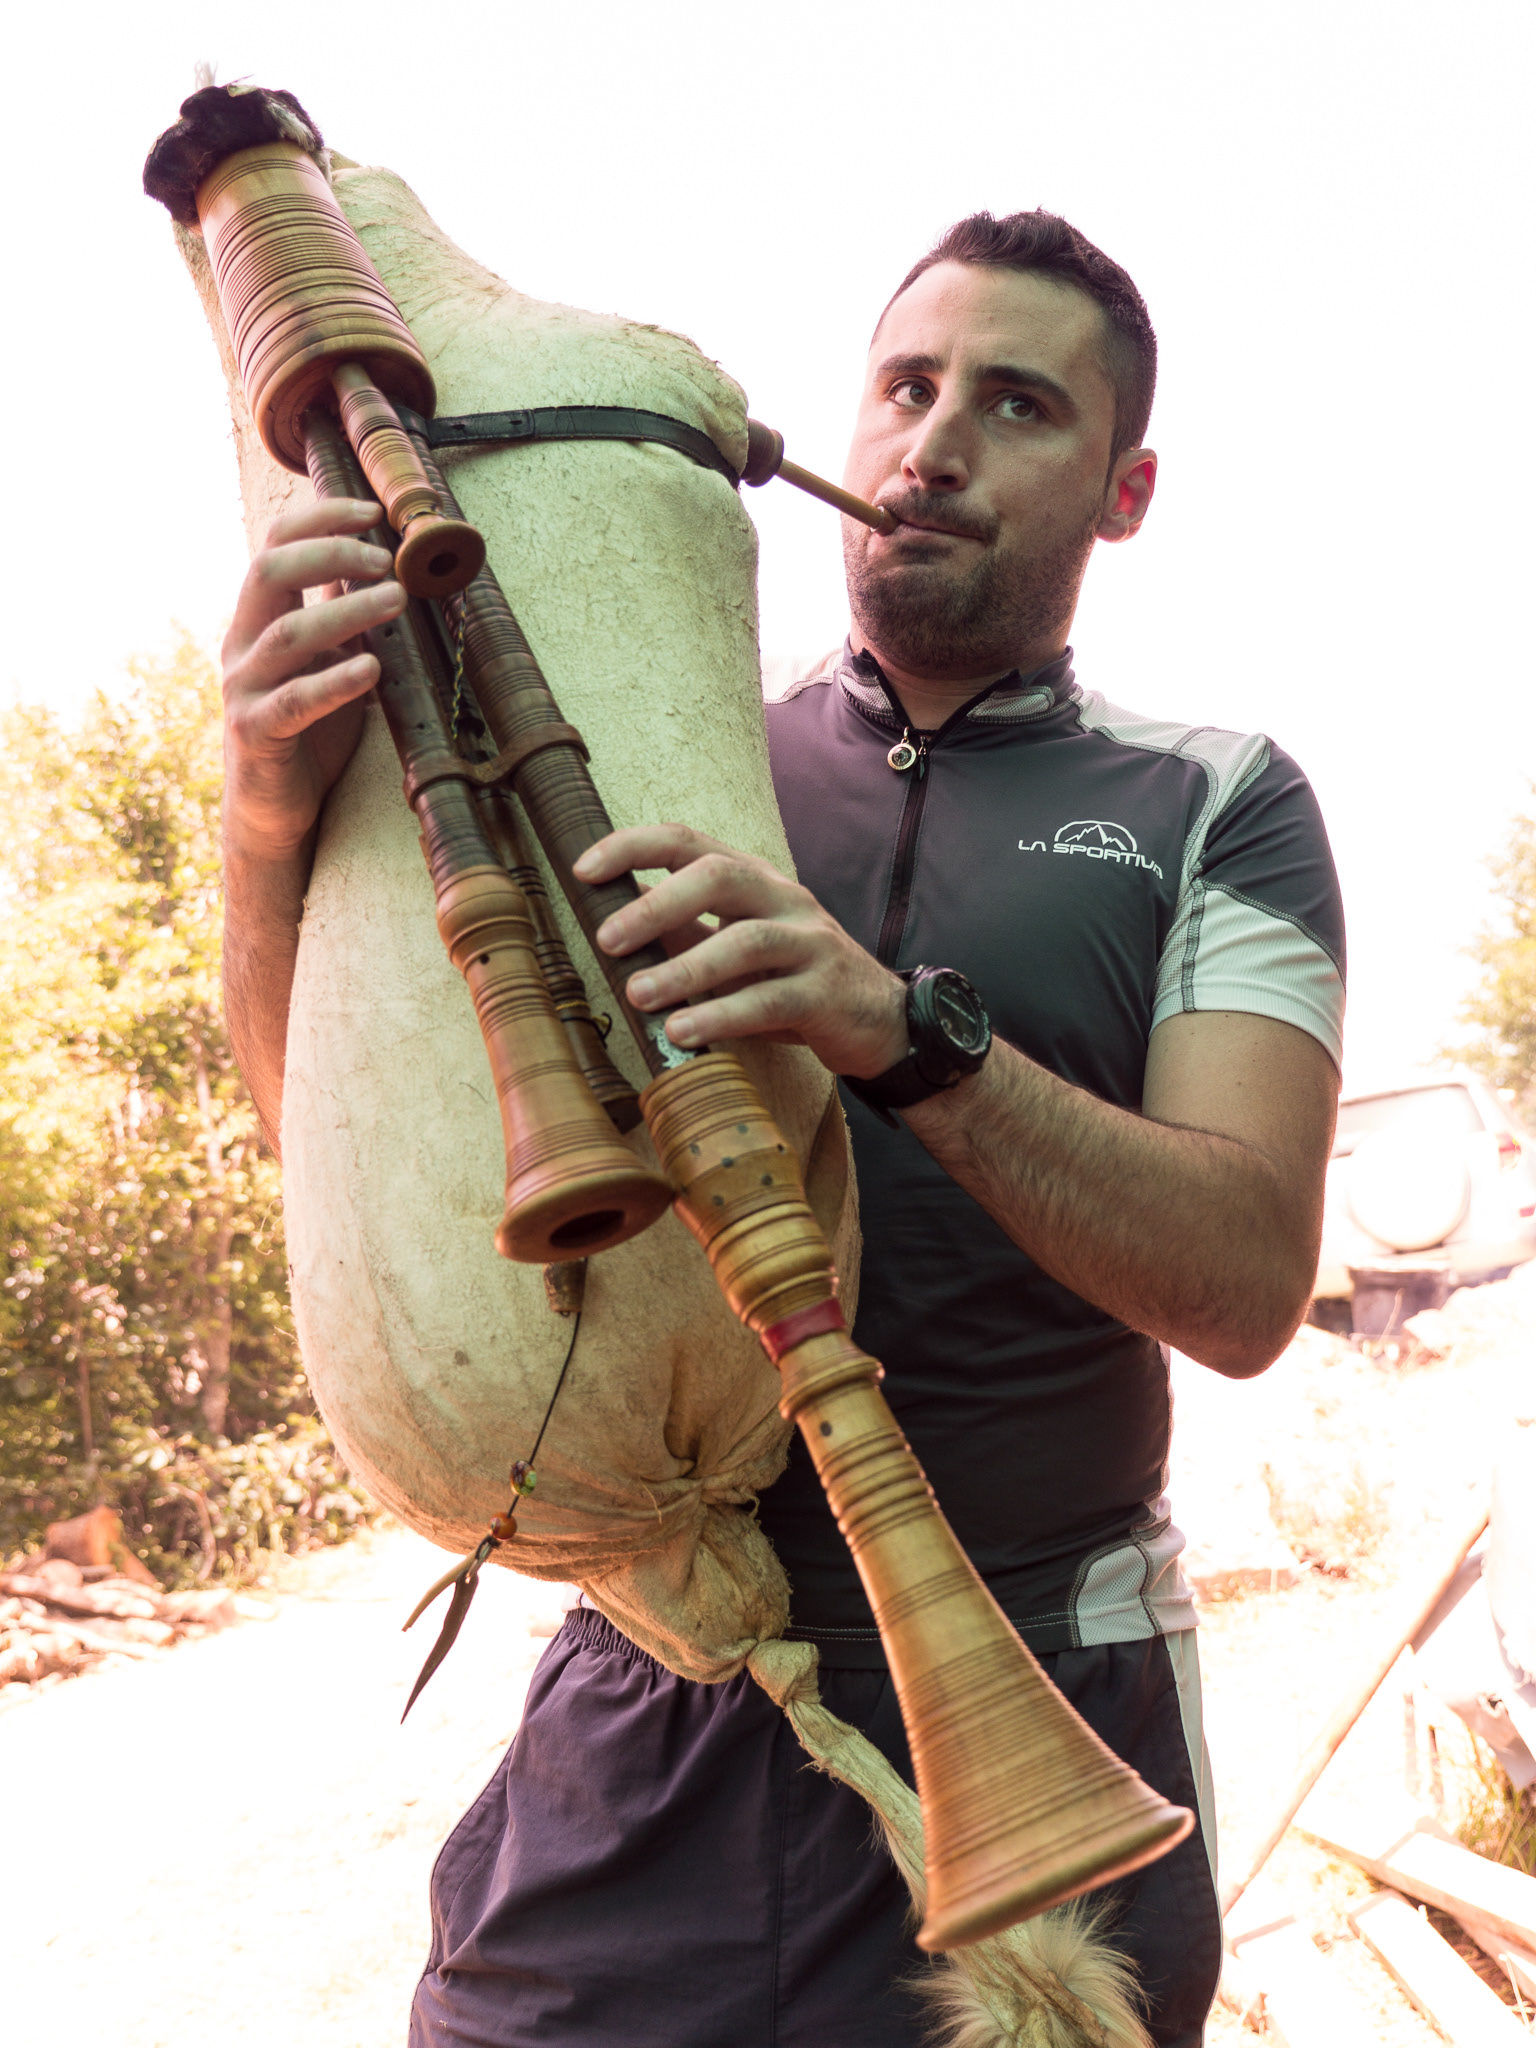
Here, on the other hand, in a difficult situation I privilege the subject, who is in the shadow, and blow out the background which is in the sun. Most cameras would have suggested a darker exposure here
What is the right exposure?
This is partly a technical and partly an aesthetic discussion. Cameras, and especially small sensors such as those in smartphones, have a limited dynamic range. This term refers to the span between the darkest and the brightest tone they can record. Often, when photographing a scene with a lot of contrast, this means a choice between privileging the highlights or the shadows. It is important to stress that our photographs do not necessarily have to reproduce the way we see, but can transform the way the world looks. Shifting the exposure with respect to what the auto mode of your camera suggests can be a powerful way to suggest meanings and moods.
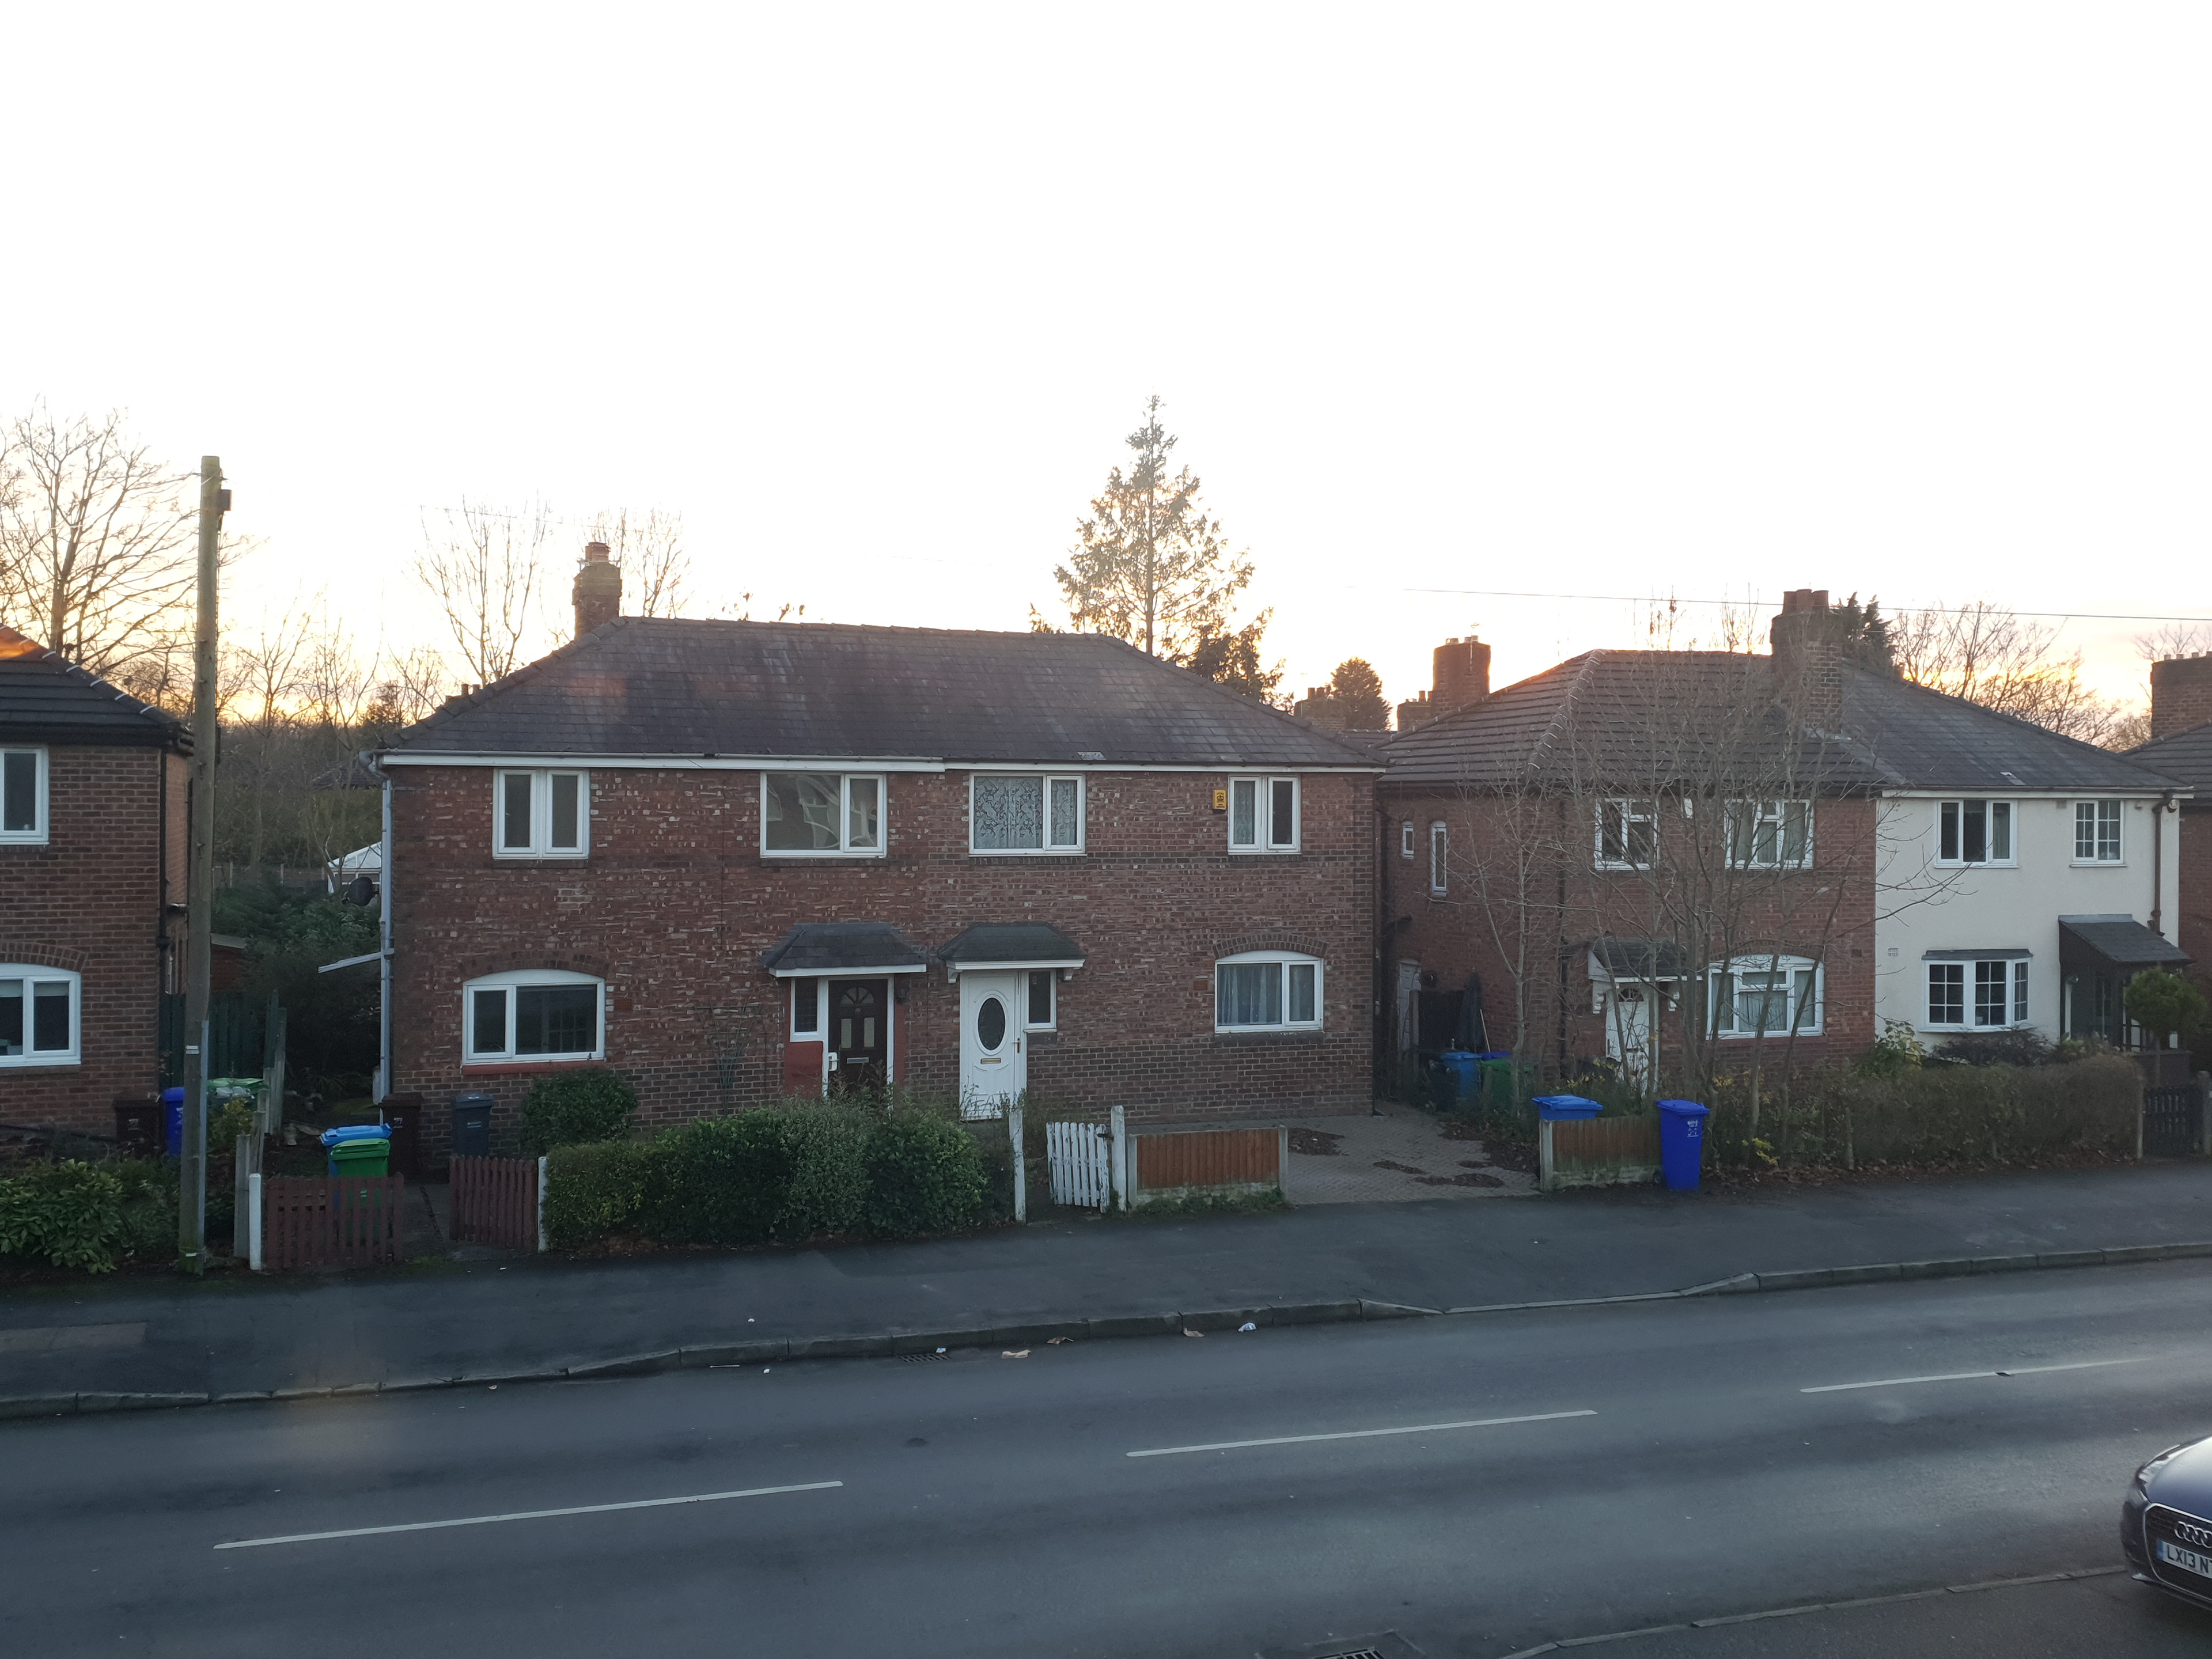
The camera takes one image in which the sky is properly exposed
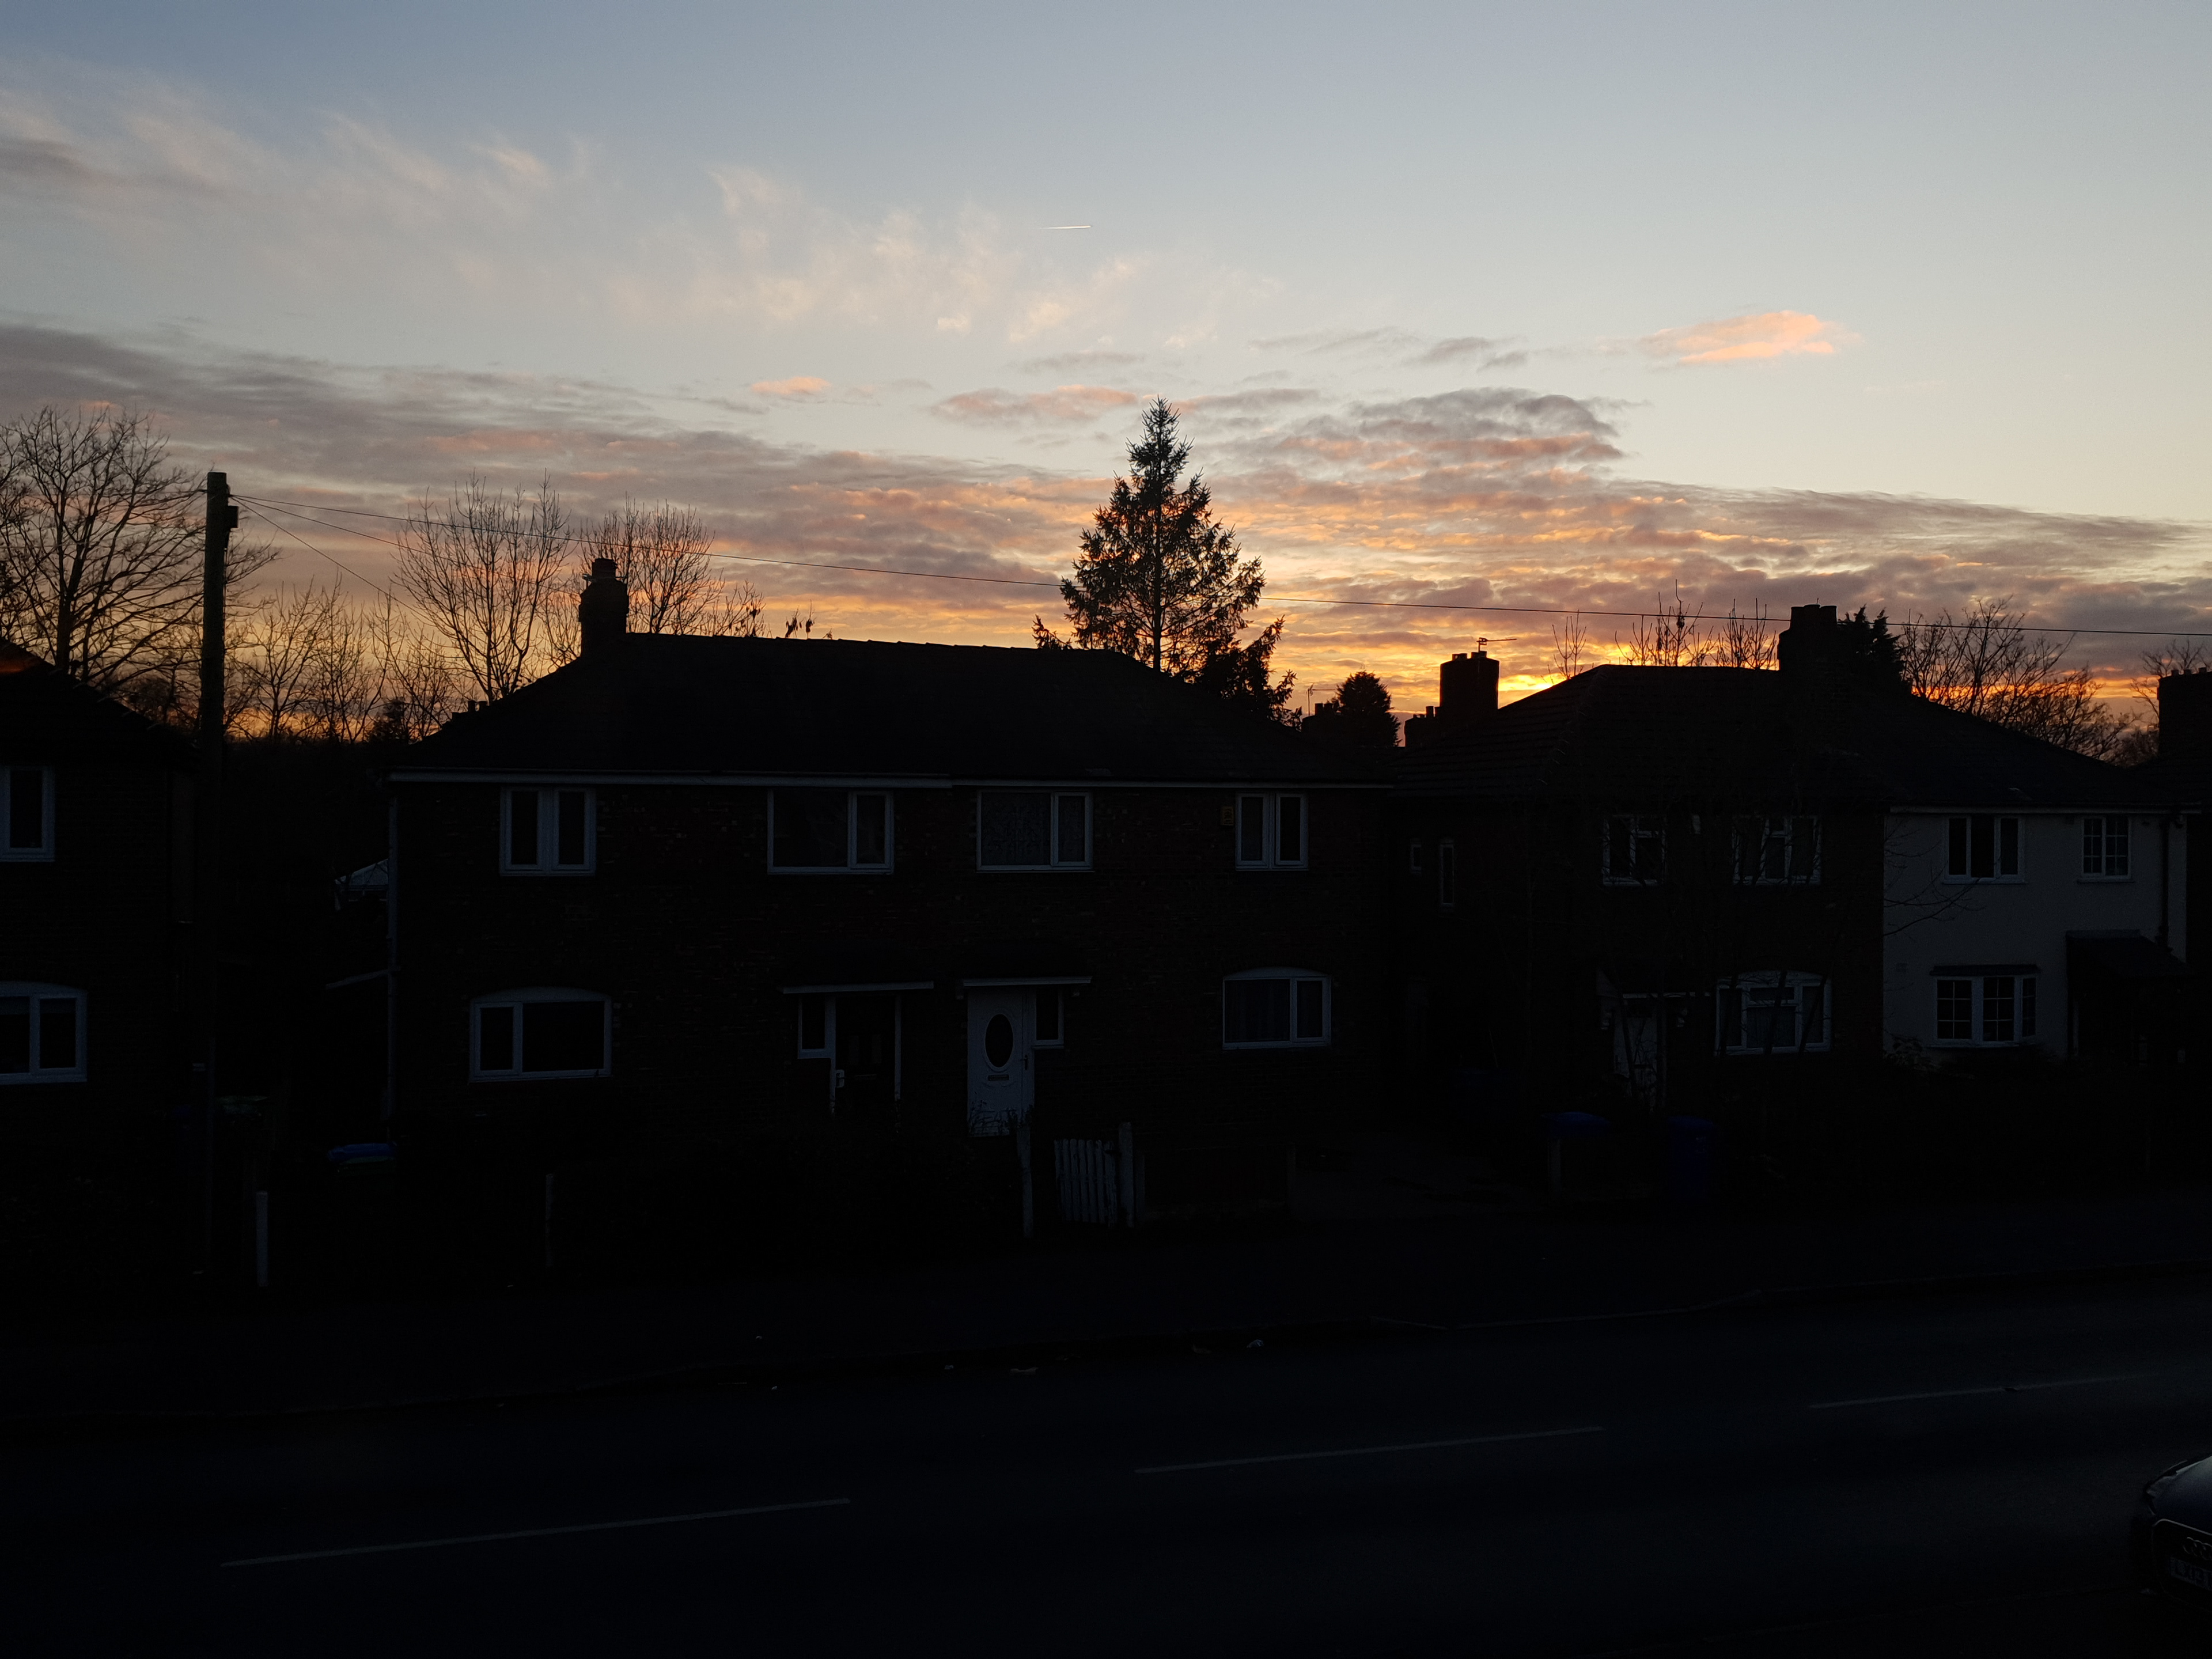
Then an image in which the darker street is properly exposed
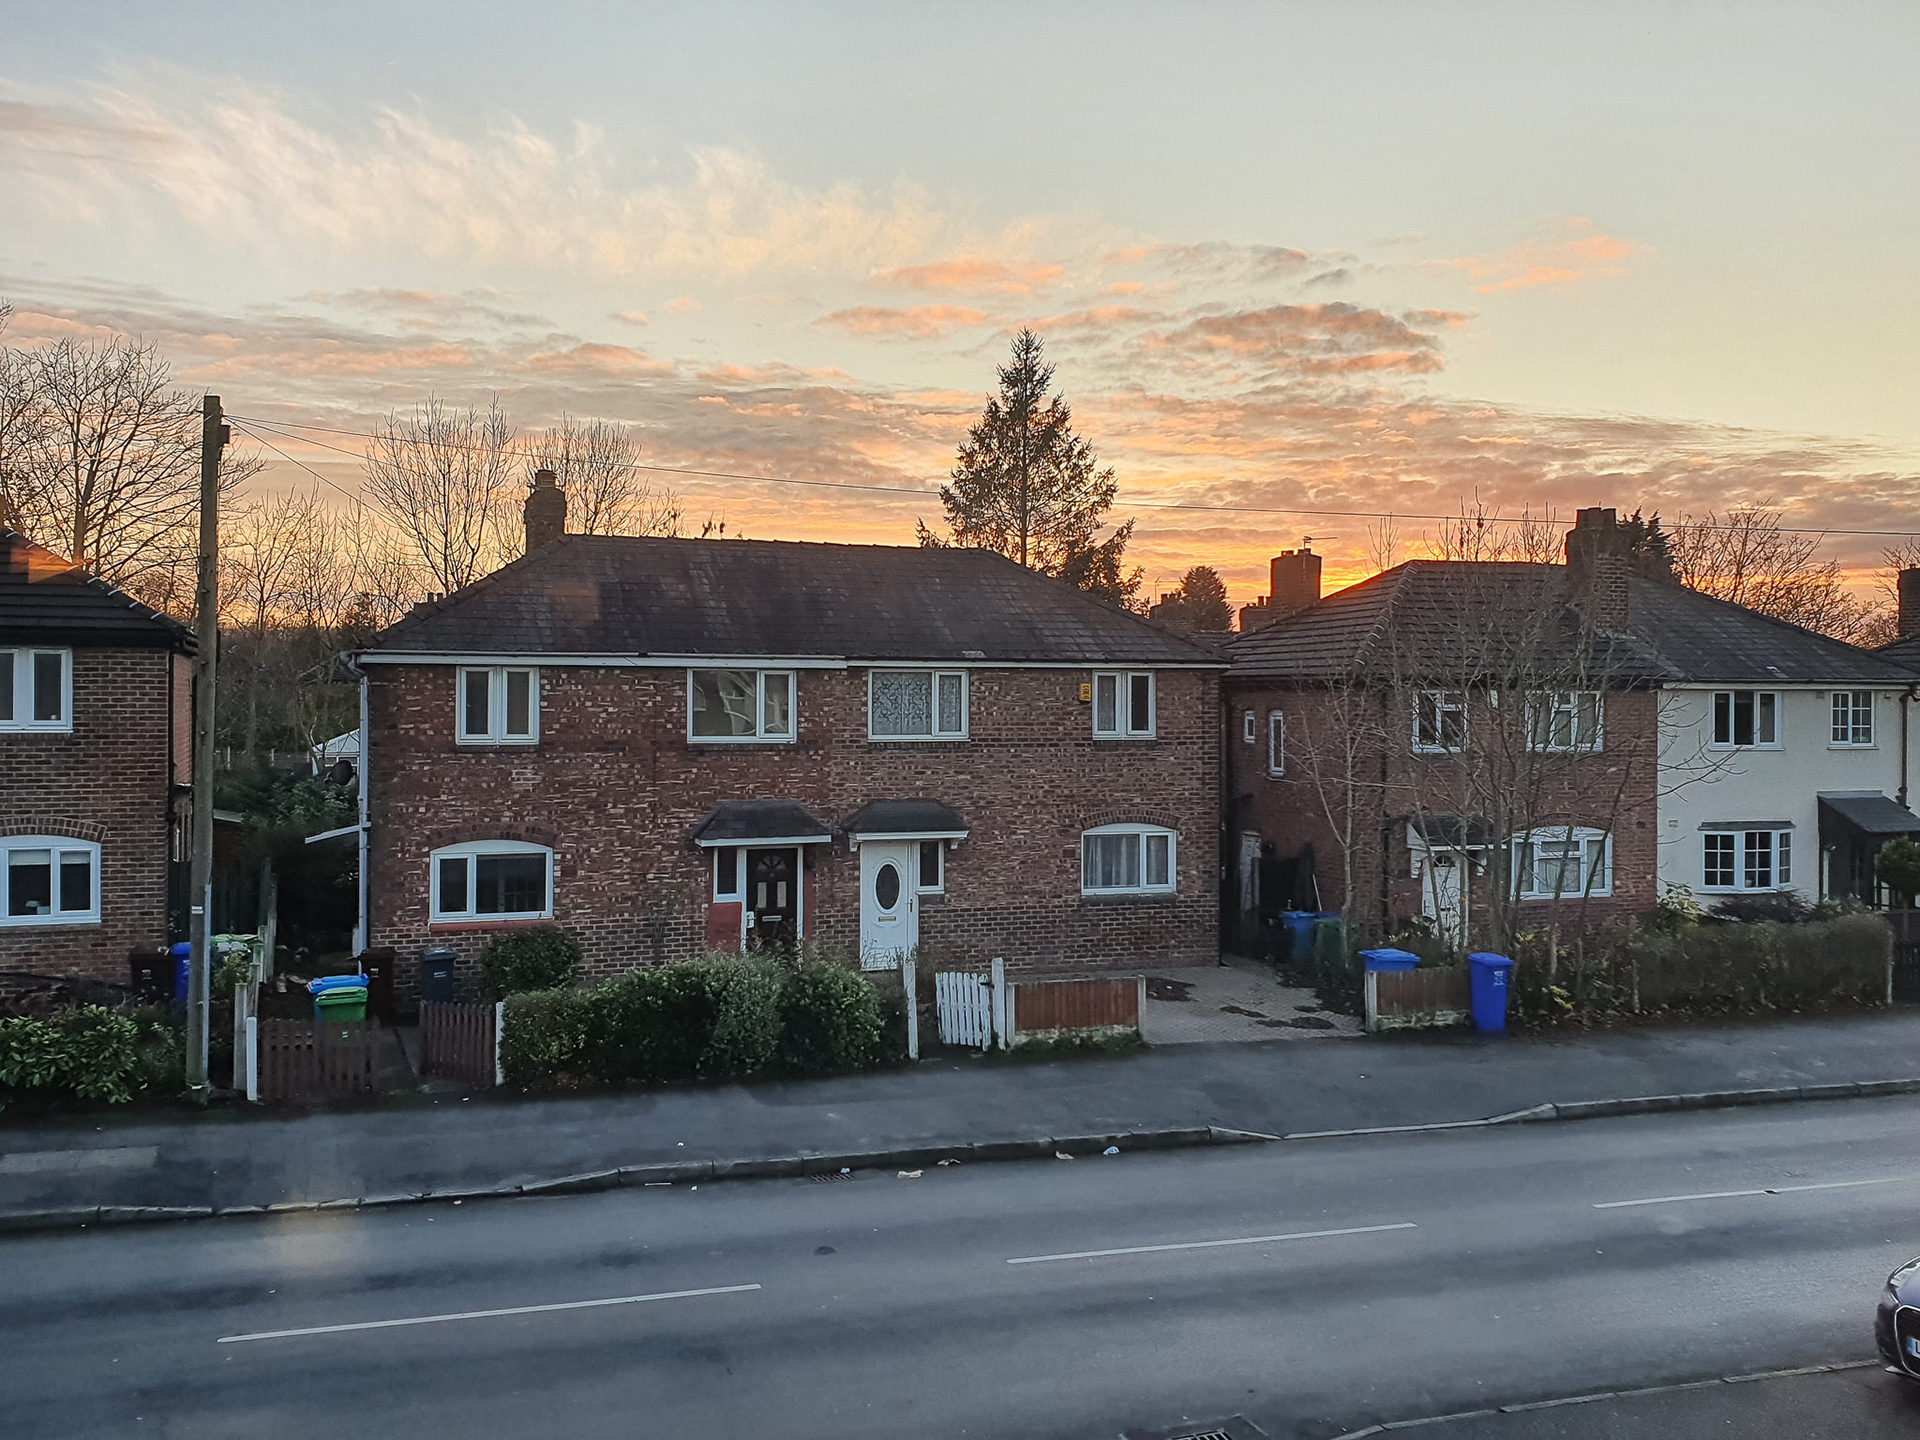
Finally, it combines the two in an HDR image
What about HDR?
HDR means High Dynamic Range and it is a way in which modern smartphone cameras deal with the limited dynamic range of their sensors. They combine the best parts of a dark and a bright exposure, taken in quick succession, in an image that retains both highlights and shadows. If you look at the example above, the resulting image is much more similar to what my eyes were seeing. It's a setting worth activating, most of the time.
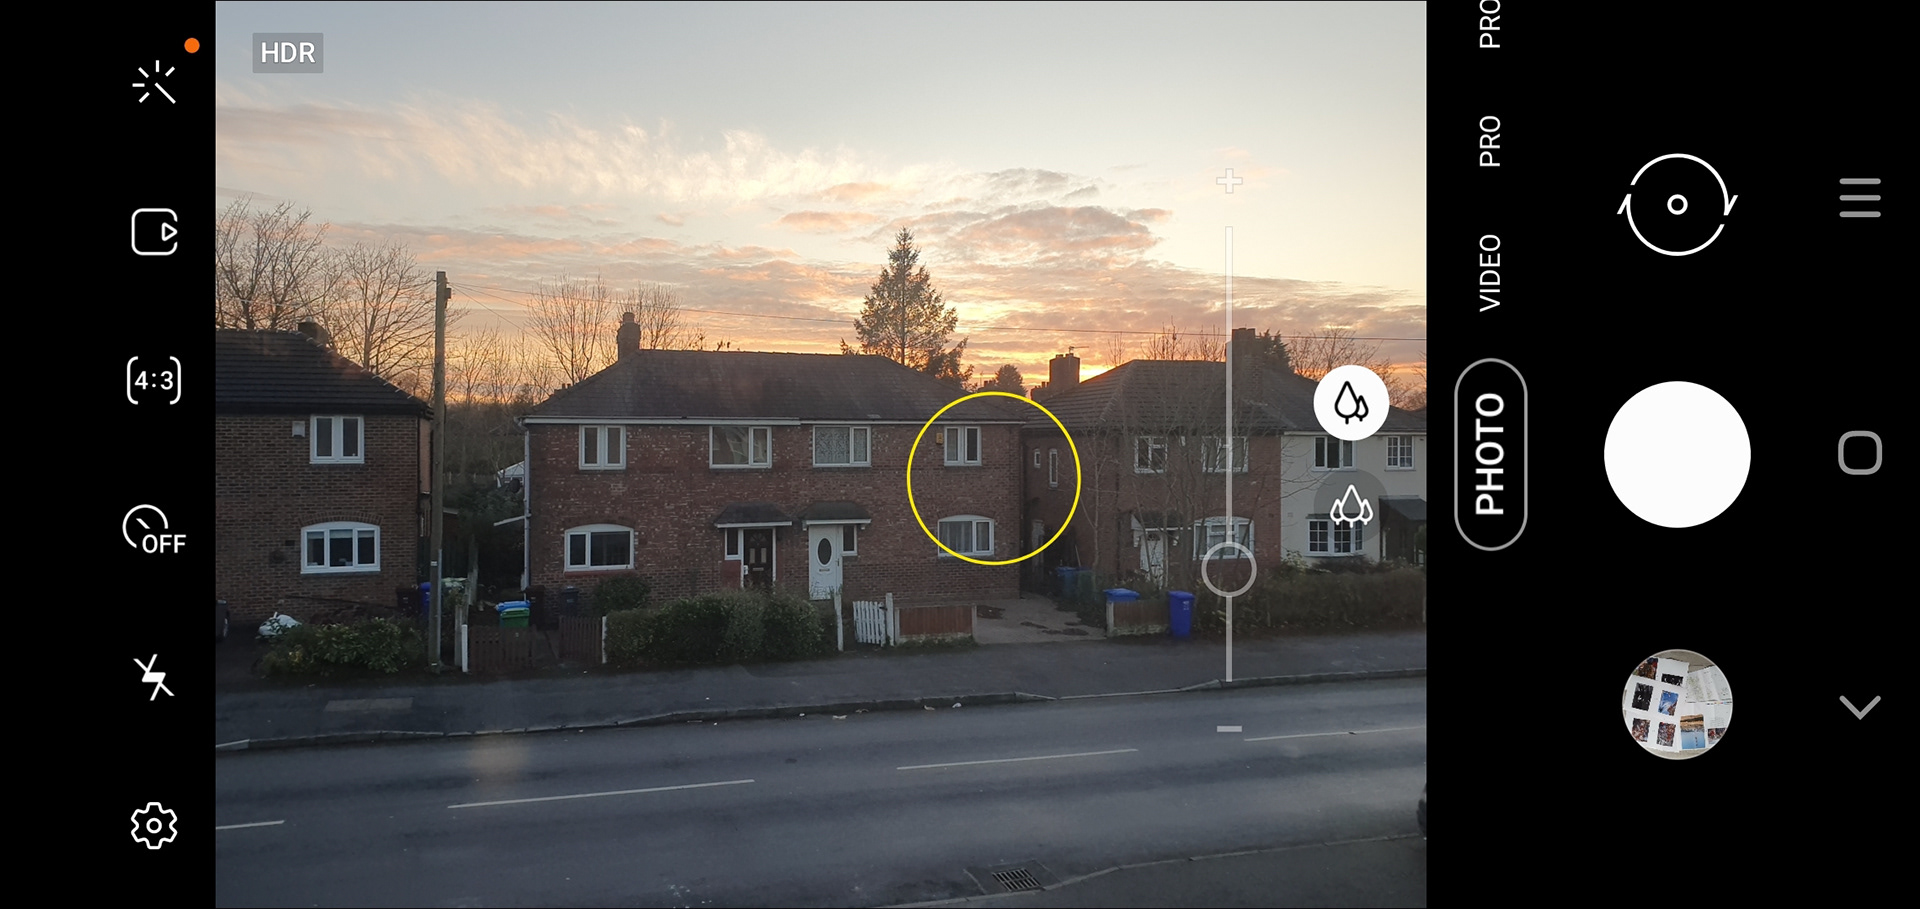
Here I am darkening the suggested automatic exposure to preserve the sky
In conclusion...
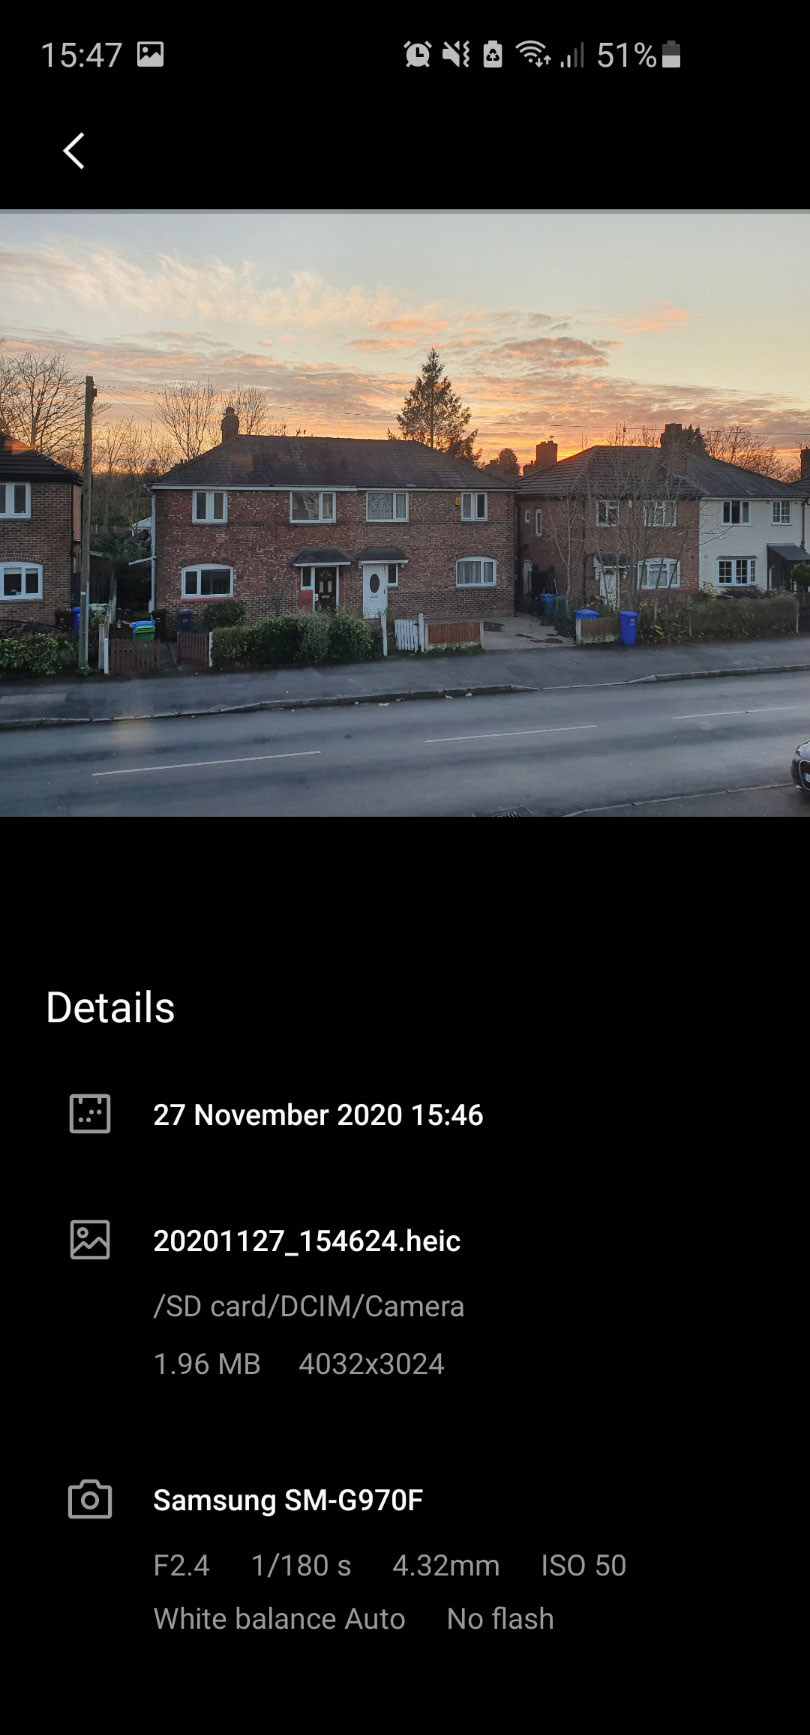
I don't necessarily recommend that you set your smartphone in fully manual mode and control each parameter by hand every time you have to take a shot, unless you are looking for a very specific effect. Rather, make sure that you learn how to alter (brighten or darken) the automatic exposure that your phone suggests. It is much quicker in this way and you can still rely on the camera app setting the lowest possible ISO to keep the shutter speed from introducing shake blur. What I recommend you do, though, is to look at the details of your images (metadata) to understand why they look the way they look.
Exercise for next tutorial:
IMPORTANT: Before you undertake any practical exercise you must fill, sign and return to the course giver the CW1 form you find on Blackboard. Your subjects also need to sign a consent form for each exercise.
Collaboration and elicitation: Create a series of collaborative portraits (up to 5), with the same person you shot for exercise 1 or someone else in your household/support bubble. Ask what kind of photo they’d like, show them the images you made of them, do a mini-interview about how they feel (mis-) represented.
Create a simple Web Page in Adobe Creative Cloud Express and upload the images there with a brief text. Submit the link on Blackboard 24 hours before next week's tutorial.